

So due to informers mass order I'm guessing there are more than a few of you with BBB's lying around.. But how do you make these red phallic objects awesome? Read on.
1st step - Get a BBB - available on Ebay, Possibly from Informer in the future too. I was going to purchase one of his but hookers and street kids took all my money... Later I happened upon a super cheap second hand one in the states and got it over here with some other guns.
Open your BBB up. Anyone who has tried this will know that it is not very easy.
Start by taking apart the front half of the gun. Now once all the screws are out of the rear half you'll notice the long tube still wont pull apart.

That is because of the little guys in the green circle. These are pegs of plastic that have been glued in place. I heated a stanley knife on the stove for a little bit and severed them in half. If after doing this you still cant get it open then run a (normal temp) knife down the seams to loosen the glue bond and then pry apart. Don't force it too much distorting the shell ruins your blaster.
When you open make sure you dont lose the following pieces.

Remember where they go and their orientation. These keep the gun primed.. very important.
In case you're mildly braindead they go in these bits.

Now. Take off the front cap of the BBB plunger assembly. I took my photos post-mod so I don't have a photo of a stock one... Here's one from Rork

Cut off the barrel where the red line is and make it flat

Prep your coupler - Drill a small hole through the coupler just behind the centre internal ridge. Put a piece of coat hanger wire through the coupler and wrap it in E-tape so it seals and no air can escape through these holes. Then saw 10mm off the back of the coupler (same end you just drilled the hole in)
I have no photos of this stage it shouldn't be too hard. You'll see later what the coupler looks like from the rear.
Now. Take a sanding drum from a dremel and sand out the barrel opening until a 20mm orange Conduit coupler will fit in.
Take lots of care, you want to the coupler to only just fit, so it will be airtight with a little glueing. Once it is in there, make sure it's straight, then glue it in (super glue or epoxy)

Then I pressed a ring of 10mm FBR into the dead space, this helps it seal, stabilises the coupler AND reduces dead space. Here you can also see the dart stop i installed in the coupler.

I took off the plunger head and nested a nightfinder spring inside the other one. This one has been stretched and is an older one so a newer generation spring may not fit/have the same results. DO NOT use a C-836.. this blaster cant handle it.. yet. BBB's have a very unreliable catch so trust me on this.

There is one things I'll leave out of this mod. That is what I did to my plunger head exactly. You have to experiment and work a few things out if you want the bitchin, vacuum loading, 100-ft ranges I'm pulling out of mine..
Here's a photo to give you a rough idea.. but it's not as simple as it seems on the surface.. Experiment

Also notice the 1 wrap of e-tape, this makes the seal between this and the front piece airtight.
Finally I cut some 10mm FBR in half down the middle, then half again, so I got a long piece with two flat faces and one curved. I glued this on top of the rear coupler lip. This removes more deadspace - Originally I added more but it interfered with the reseting of the catch by impeding the plunger head movement. Learn from my mistake.

Add an additional catch spring. It will need it. Make SURE the catch does not pop out when you are re-assembling.

Put it all back together, wrap some e-tape around the top of the part of the shell where we severed the nubs, as nothing is holding these two halves down the front anymore.
Screw it all back together. And BOOM. Awesomeness.
From here you should be getting 60' flat minimum - the climb to the hallowed 100 ft mark is simply optimising seal on the plunger head, and finding the optimal dart/barrel combination. All my barrels are nested in a 3-5cm section of grey 20mm conduit, for use with the coupler.
To give you an idea on how effective all of my sealing efforts are - if there is a dart in the barrel when I prime the gun the plunger head COMES OFF the plunger tube as it cannot suck in enough air.
Also here it is primed

If I form a seal over the coupler with my hand and fire the plunger STOPS halfway through its stroke

The air then slowly leaks out, I thought this meant my seal could be better but Tidge has since informed me it is intrinsic of this plunger head type to flex after it comes to a rest after rapid movement, hence the slow air release.
So yeah, it is basically 99% optimized as far as flow, lack of deadspace and seal is concerned.
Final step
Shoot Bitches.
I'm pulling 90-110 with optimal dart/barrel combos on this.. minimum of 70 even with bad combos.

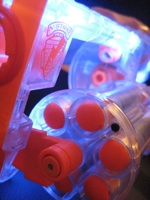
I pity the Adelaide nerfer who gets this view on saturday

Enjoy kids
Aj
1st step - Get a BBB - available on Ebay, Possibly from Informer in the future too. I was going to purchase one of his but hookers and street kids took all my money... Later I happened upon a super cheap second hand one in the states and got it over here with some other guns.
Open your BBB up. Anyone who has tried this will know that it is not very easy.
Start by taking apart the front half of the gun. Now once all the screws are out of the rear half you'll notice the long tube still wont pull apart.
That is because of the little guys in the green circle. These are pegs of plastic that have been glued in place. I heated a stanley knife on the stove for a little bit and severed them in half. If after doing this you still cant get it open then run a (normal temp) knife down the seams to loosen the glue bond and then pry apart. Don't force it too much distorting the shell ruins your blaster.
When you open make sure you dont lose the following pieces.
Remember where they go and their orientation. These keep the gun primed.. very important.
In case you're mildly braindead they go in these bits.
Now. Take off the front cap of the BBB plunger assembly. I took my photos post-mod so I don't have a photo of a stock one... Here's one from Rork
Cut off the barrel where the red line is and make it flat
Prep your coupler - Drill a small hole through the coupler just behind the centre internal ridge. Put a piece of coat hanger wire through the coupler and wrap it in E-tape so it seals and no air can escape through these holes. Then saw 10mm off the back of the coupler (same end you just drilled the hole in)
I have no photos of this stage it shouldn't be too hard. You'll see later what the coupler looks like from the rear.
Now. Take a sanding drum from a dremel and sand out the barrel opening until a 20mm orange Conduit coupler will fit in.
Take lots of care, you want to the coupler to only just fit, so it will be airtight with a little glueing. Once it is in there, make sure it's straight, then glue it in (super glue or epoxy)
Then I pressed a ring of 10mm FBR into the dead space, this helps it seal, stabilises the coupler AND reduces dead space. Here you can also see the dart stop i installed in the coupler.
I took off the plunger head and nested a nightfinder spring inside the other one. This one has been stretched and is an older one so a newer generation spring may not fit/have the same results. DO NOT use a C-836.. this blaster cant handle it.. yet. BBB's have a very unreliable catch so trust me on this.
There is one things I'll leave out of this mod. That is what I did to my plunger head exactly. You have to experiment and work a few things out if you want the bitchin, vacuum loading, 100-ft ranges I'm pulling out of mine..
Here's a photo to give you a rough idea.. but it's not as simple as it seems on the surface.. Experiment
Also notice the 1 wrap of e-tape, this makes the seal between this and the front piece airtight.
Finally I cut some 10mm FBR in half down the middle, then half again, so I got a long piece with two flat faces and one curved. I glued this on top of the rear coupler lip. This removes more deadspace - Originally I added more but it interfered with the reseting of the catch by impeding the plunger head movement. Learn from my mistake.
Add an additional catch spring. It will need it. Make SURE the catch does not pop out when you are re-assembling.
Put it all back together, wrap some e-tape around the top of the part of the shell where we severed the nubs, as nothing is holding these two halves down the front anymore.
Screw it all back together. And BOOM. Awesomeness.
From here you should be getting 60' flat minimum - the climb to the hallowed 100 ft mark is simply optimising seal on the plunger head, and finding the optimal dart/barrel combination. All my barrels are nested in a 3-5cm section of grey 20mm conduit, for use with the coupler.
To give you an idea on how effective all of my sealing efforts are - if there is a dart in the barrel when I prime the gun the plunger head COMES OFF the plunger tube as it cannot suck in enough air.
Also here it is primed
If I form a seal over the coupler with my hand and fire the plunger STOPS halfway through its stroke
The air then slowly leaks out, I thought this meant my seal could be better but Tidge has since informed me it is intrinsic of this plunger head type to flex after it comes to a rest after rapid movement, hence the slow air release.
So yeah, it is basically 99% optimized as far as flow, lack of deadspace and seal is concerned.
Final step
Shoot Bitches.
I'm pulling 90-110 with optimal dart/barrel combos on this.. minimum of 70 even with bad combos.
I pity the Adelaide nerfer who gets this view on saturday
Enjoy kids
Aj