

Hi,
There's bulk material available on the web for LS mod's, but not a great deal in our Mod Directory. Seeing as I'm in the process of modding 4 LShot's, I thought I may as well document the procedure.
Mod's to be completed:
* Boltsled reinforcement
* Plunger reinforcement
* Brass Breech
* Stock reinforcement
* Spring and o-ring upgrade
* Red dot laser
Tools/materials required:
* Basic tool kit (screw-drivers, hammer, pliers, side-cutters etc)
* Hot glue gun and glue sticks
* Dremel/rotary tool with cut-off wheel, sanding drum etc
* Soldering iron and solder
* 16mm conduit
* 1/2", 17/32", 9/16" and 19/32" brass tubing
* Metal coathanger or aluminium sheeting
* Epoxy adhesive
* Red dot laser module
* Switch
* Hook-up wire
* Batteries and battery holder
* LED and mount
* Plunger padding
* Upgraded spring and o-rings
* Thread tape
* Silicone grease
Okay, start with disassembling the blaster - removing the stock first.
To prevent the stock moving while priming (to gain more leverage) cut 3 pieces of conduit, and hot-glue them in to the stock like this:

Next, we'll make the brass breech. Credit goes to ForsakenAngel and SgNerf, who both have written in-depth tutorials on making the breech. Also, if you want to make it so that you can load a clip whilst the breech is open, you'll need to substitute cutting a half-pipe with a quarter-pipe. Full credit goes to Phuonguyen for discovering this alteration. I'll only be giving a brief description in this tutorial (as I don't see much point in re-inventing the wheel.)
Take your 1 foot long piece of 9/16" brass tubing, and cut an 8cm half-pipe, this will be the barrel. Smooth out any jagged edges with your rotary tool attachment of choice. Also, remember that it's generally a good idea to polish the brass inside and out using Brasso polish. Once this is done, you can also add tightening rings if you so wish.
Now that the barrel has been fabricated, it's time to move on to the bolt. Cut a 2cm long piece of both 9/16" and 17/32". Also cut an 11cm piece of 1/2" and a 17cm piece of 19/32". Cut a 5.5cm half-pipe in to the 19/32", and smooth out any jagged edges.
Next, cut the plastic bolt and remove it from the plunger tube. Remove the 3 posts, and cut the black piece approximately 1cm long. Nest the 4 sections of brass together using epoxy adhesive, and glue this to the black piece of the original bolt. It's a good idea to put a piece of 9/16" a little way inside the 19/32" from the half-pipe end, to ensure the 1/2" is aligned properly. This is what it should look like, and it will take up to 72 hours to cure properly.

Cut the orange nub that attaches to the boltsled, and glue it to the 19/32" half-pipe using epoxy adhesive. You'll need to trim it down so it fits inside the plunger tube.

Also, fill in the black part of the original plunger tube with hot glue, like so:

Remember to allow adequate time for the epoxy adhesive to cure on all pieces of the breech.
Bolt-sled reinforcement. By adding extra spring/s, it will obviously require more force to prime the blaster. This causes extra pressure on the boltsled, making it weaken and fatigue. You can strenghten the bolt-sled with a coat-hanger, or aluminium sheeting. There are write-ups in the FAQ section that describe this process in detail.

Next, remove the plunger head. There are numerous spring combinations that can be utilised in the LS. I've settled on the stock spring, with a BT V2 LShot spring. Add these springs, and replace the plunger head. Once assembled, apply some epoxy adhesive to the plunger rod, to stop the head from snapping off. You'll also want to add a stronger spring on the trigger catch (or nest 2 springs if you need to).

You'll also want to add some padding to the plunger head, to prevent damage from dry-firing. I've also replaced the stock o-ring with 2 x custom o-rings, and one layer of thread tape underneath. Apply some silicone grease to the o-rings.

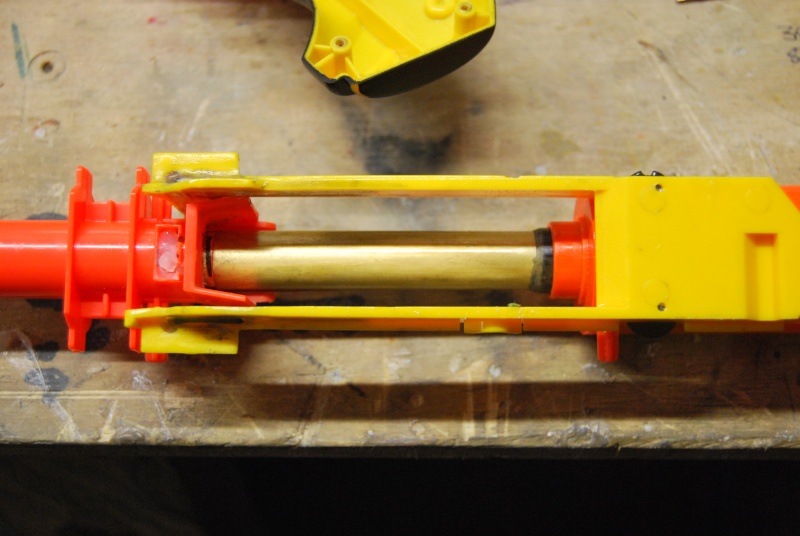
Now back to the breech. Once everything has cured properly, you'll need to nest the 9/16" half-pipe inside the original stock barrel. There's various ways to do this - I use some e-tape to make it fit snugly, and permanently attach it using epoxy adhesive and hot-glue. The completed barrel:

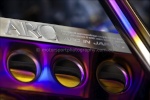
Attach the bolt to the bolt-sled, and check that everything is properly aligned. Test that the darts will fit properly, and that the 9/16" half-pipe slides smoothly inside the 19/32". Breech open:

Breech closed:
Okay, now that the breech is finished, all that is left to do is the laser-dot module. Drill a hole in the orange piece that clips in to the front of the blaster on the top, big enough to mount the module.
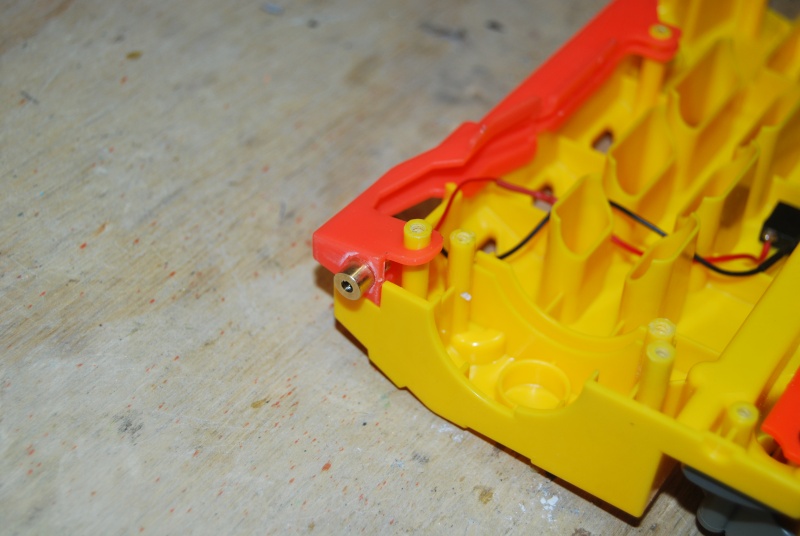
Also, drill a hole in to the shell, to mount your switch. I'm using a forward-clicky switch used in tail-cap operated torches. Attach the positive wire from the laser module to the switch, and another positive wire from the switch to your power supply (I'm using 2 x AA batteries to suit the power requirements of the laser). Attach the negative wire from the module to the battery.
I've also installed a led light on the handle of the LS, to indicate when the red-dot is operational. Run a positive wire from the module side of the switch to a LED (use a resistor if necessary). Also, run a negative wire from the battery to the led. Solder all connections, and shroud with heat-shrink.


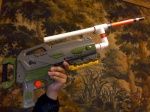
All that's left to do is to re-assemble the blaster, and lubricate any parts you deem necessary.
NB: you won't be needing these pieces:

And that's the end of the mod. With this configuration, I'm consistently hitting flat ranges of 150 feet plus (using custom-weighted blue foam/mini snap-cap darts), with only an occasional dart chomped by the brass breech.
Please feel free to comment with any other valuable info, as I've been awake for 30 hours straight, and the old brain isn't as sharp as it normally is.
Cheers
There's bulk material available on the web for LS mod's, but not a great deal in our Mod Directory. Seeing as I'm in the process of modding 4 LShot's, I thought I may as well document the procedure.
Mod's to be completed:
* Boltsled reinforcement
* Plunger reinforcement
* Brass Breech
* Stock reinforcement
* Spring and o-ring upgrade
* Red dot laser
Tools/materials required:
* Basic tool kit (screw-drivers, hammer, pliers, side-cutters etc)
* Hot glue gun and glue sticks
* Dremel/rotary tool with cut-off wheel, sanding drum etc
* Soldering iron and solder
* 16mm conduit
* 1/2", 17/32", 9/16" and 19/32" brass tubing
* Metal coathanger or aluminium sheeting
* Epoxy adhesive
* Red dot laser module
* Switch
* Hook-up wire
* Batteries and battery holder
* LED and mount
* Plunger padding
* Upgraded spring and o-rings
* Thread tape
* Silicone grease
Okay, start with disassembling the blaster - removing the stock first.
To prevent the stock moving while priming (to gain more leverage) cut 3 pieces of conduit, and hot-glue them in to the stock like this:
Next, we'll make the brass breech. Credit goes to ForsakenAngel and SgNerf, who both have written in-depth tutorials on making the breech. Also, if you want to make it so that you can load a clip whilst the breech is open, you'll need to substitute cutting a half-pipe with a quarter-pipe. Full credit goes to Phuonguyen for discovering this alteration. I'll only be giving a brief description in this tutorial (as I don't see much point in re-inventing the wheel.)
Take your 1 foot long piece of 9/16" brass tubing, and cut an 8cm half-pipe, this will be the barrel. Smooth out any jagged edges with your rotary tool attachment of choice. Also, remember that it's generally a good idea to polish the brass inside and out using Brasso polish. Once this is done, you can also add tightening rings if you so wish.
Now that the barrel has been fabricated, it's time to move on to the bolt. Cut a 2cm long piece of both 9/16" and 17/32". Also cut an 11cm piece of 1/2" and a 17cm piece of 19/32". Cut a 5.5cm half-pipe in to the 19/32", and smooth out any jagged edges.
Next, cut the plastic bolt and remove it from the plunger tube. Remove the 3 posts, and cut the black piece approximately 1cm long. Nest the 4 sections of brass together using epoxy adhesive, and glue this to the black piece of the original bolt. It's a good idea to put a piece of 9/16" a little way inside the 19/32" from the half-pipe end, to ensure the 1/2" is aligned properly. This is what it should look like, and it will take up to 72 hours to cure properly.
Cut the orange nub that attaches to the boltsled, and glue it to the 19/32" half-pipe using epoxy adhesive. You'll need to trim it down so it fits inside the plunger tube.
Also, fill in the black part of the original plunger tube with hot glue, like so:
Remember to allow adequate time for the epoxy adhesive to cure on all pieces of the breech.
Bolt-sled reinforcement. By adding extra spring/s, it will obviously require more force to prime the blaster. This causes extra pressure on the boltsled, making it weaken and fatigue. You can strenghten the bolt-sled with a coat-hanger, or aluminium sheeting. There are write-ups in the FAQ section that describe this process in detail.
Next, remove the plunger head. There are numerous spring combinations that can be utilised in the LS. I've settled on the stock spring, with a BT V2 LShot spring. Add these springs, and replace the plunger head. Once assembled, apply some epoxy adhesive to the plunger rod, to stop the head from snapping off. You'll also want to add a stronger spring on the trigger catch (or nest 2 springs if you need to).
You'll also want to add some padding to the plunger head, to prevent damage from dry-firing. I've also replaced the stock o-ring with 2 x custom o-rings, and one layer of thread tape underneath. Apply some silicone grease to the o-rings.
Now back to the breech. Once everything has cured properly, you'll need to nest the 9/16" half-pipe inside the original stock barrel. There's various ways to do this - I use some e-tape to make it fit snugly, and permanently attach it using epoxy adhesive and hot-glue. The completed barrel:
Attach the bolt to the bolt-sled, and check that everything is properly aligned. Test that the darts will fit properly, and that the 9/16" half-pipe slides smoothly inside the 19/32". Breech open:
Breech closed:
Okay, now that the breech is finished, all that is left to do is the laser-dot module. Drill a hole in the orange piece that clips in to the front of the blaster on the top, big enough to mount the module.
Also, drill a hole in to the shell, to mount your switch. I'm using a forward-clicky switch used in tail-cap operated torches. Attach the positive wire from the laser module to the switch, and another positive wire from the switch to your power supply (I'm using 2 x AA batteries to suit the power requirements of the laser). Attach the negative wire from the module to the battery.
I've also installed a led light on the handle of the LS, to indicate when the red-dot is operational. Run a positive wire from the module side of the switch to a LED (use a resistor if necessary). Also, run a negative wire from the battery to the led. Solder all connections, and shroud with heat-shrink.
All that's left to do is to re-assemble the blaster, and lubricate any parts you deem necessary.
NB: you won't be needing these pieces:
And that's the end of the mod. With this configuration, I'm consistently hitting flat ranges of 150 feet plus (using custom-weighted blue foam/mini snap-cap darts), with only an occasional dart chomped by the brass breech.
Please feel free to comment with any other valuable info, as I've been awake for 30 hours straight, and the old brain isn't as sharp as it normally is.
Cheers
Last edited by clunk07 on Thu Apr 12, 2012 3:49 pm; edited 2 times in total