Aim:
Basically to ‘tune up’ the Firestrike and give it a swappable inline clip system to dramatically increase it’s DPS, whilst keeping it as stock looking as possible. Since I'm an Australian nerfer, and have access to slightly different materials to work with I've included some alternative materials to the ones I've used.
Materials:
1x Firestrike (I used the Australian version, but any should do)
1x SGNerf 8kg Retaliator/Rampage replacement spring (or any suitable replacement spring)
1x 20mm UPVC electrical conduit coupler (could be substituted for a 1/2" PVC coupler instead)
1x Papermate ball point pen (almost any pen will do)
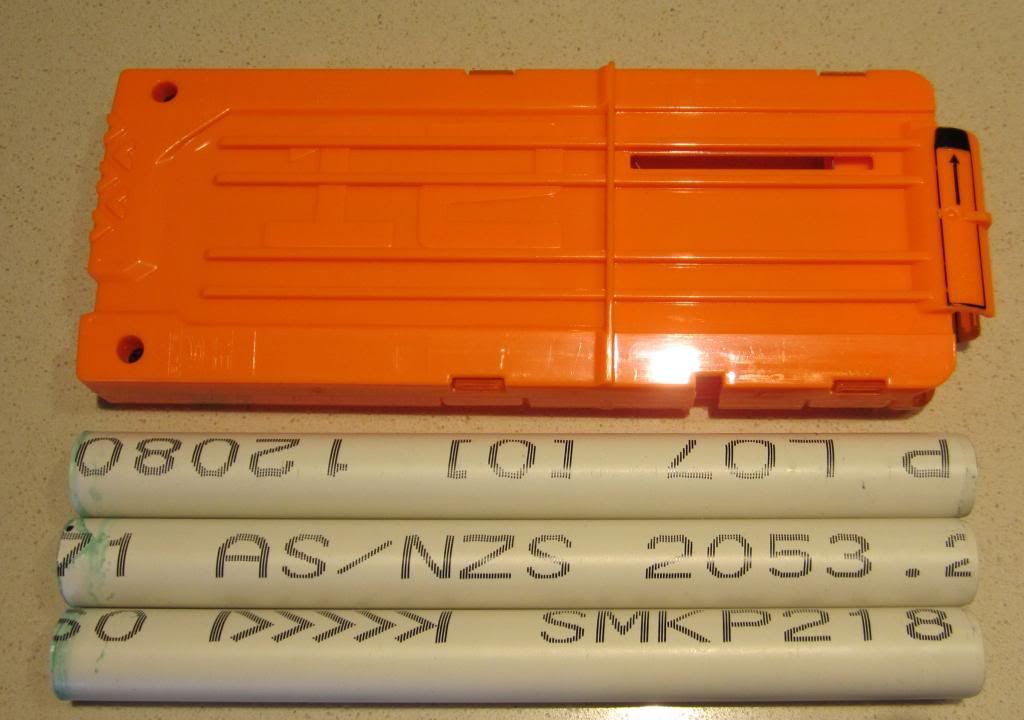
16mm UPVC thin-walled (grey) electrical conduit (could be substituted for 1/2" CPVC instead, 17/32" brass could be substituted for the barrel)
20mm UPVC thin-walled (grey) electrical conduit (could be substituted for 1/2" PVC instead)
20mm UPVC thick-walled (orange) electrical conduit (could be substituted for 1/2" PVC instead)
2mm brass rod (a small nail could be used instead)
Etape
Epoxy
Superglue
White lithium greese
Plumbers goop
Tools:
Dremel
Pipe Cutter
Screwdriver
Various knives (I used a hobby scalpel and a swiss army knife)
Needle Nosed Pliers
File
Sandpaper
Pinvice (a drill with a small drill-bit would suffice)
Disassembly:
Remove all the shell screws and open it up. All the screws seem to be the same, so you don't need to keep them in any kind of order. Try not to lose this little nut that holds the battery door on. Put it aside in a safe place.

AR Removal and clip reciever:
Grab your main assembly and pull it apart.

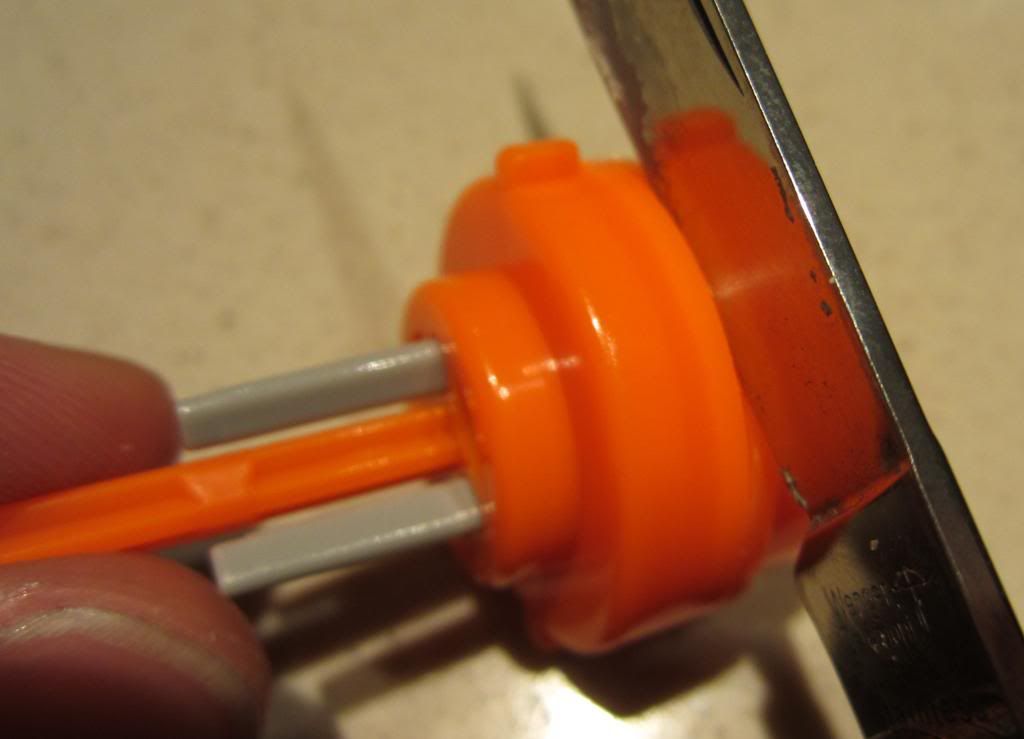
Firstly you need this piece that contains the AR and acts as the plunger-tube cap.
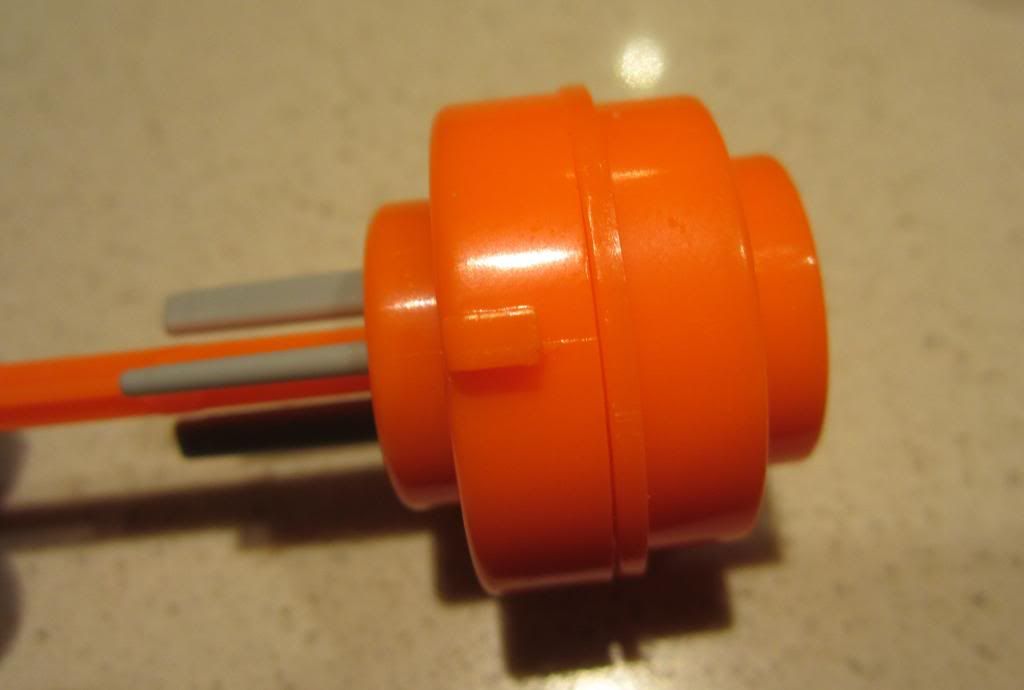
Use a knife to pry it open at the seem. It's not glued together so it should just come apart.
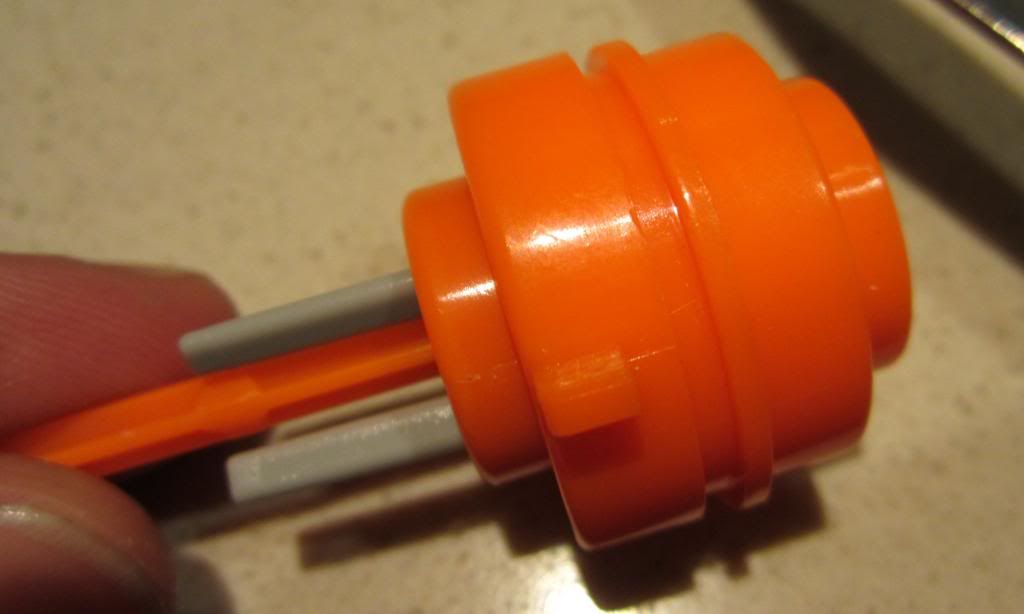

These are what we want. Discard the air restrictor.

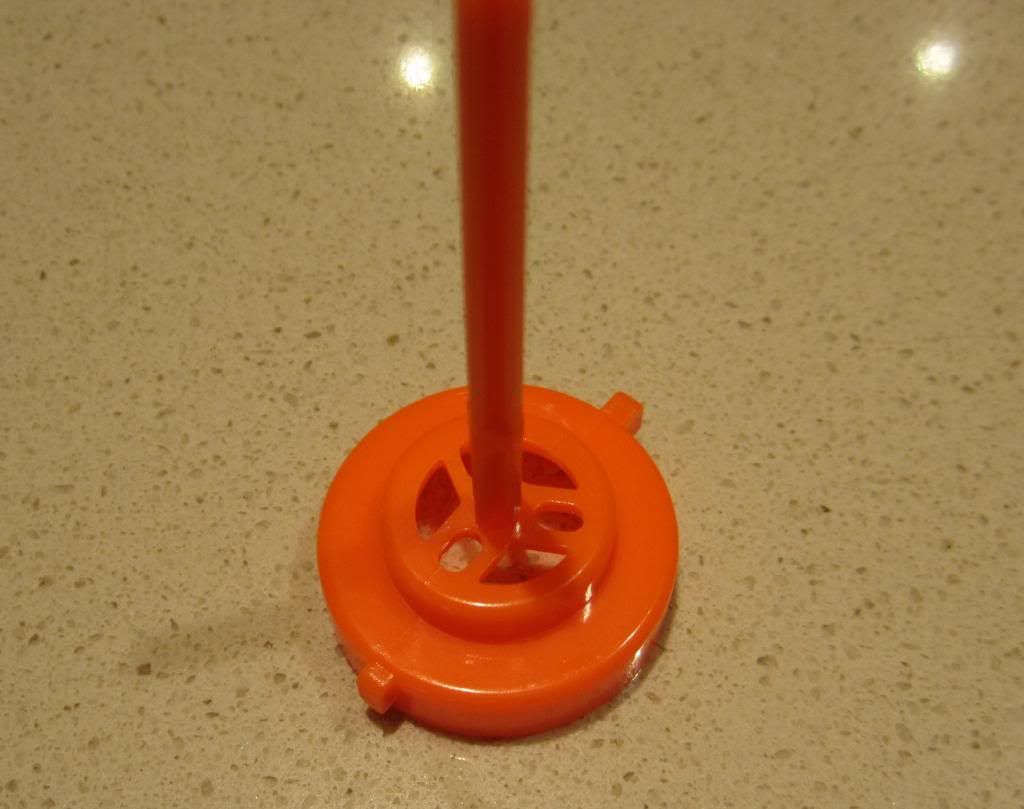
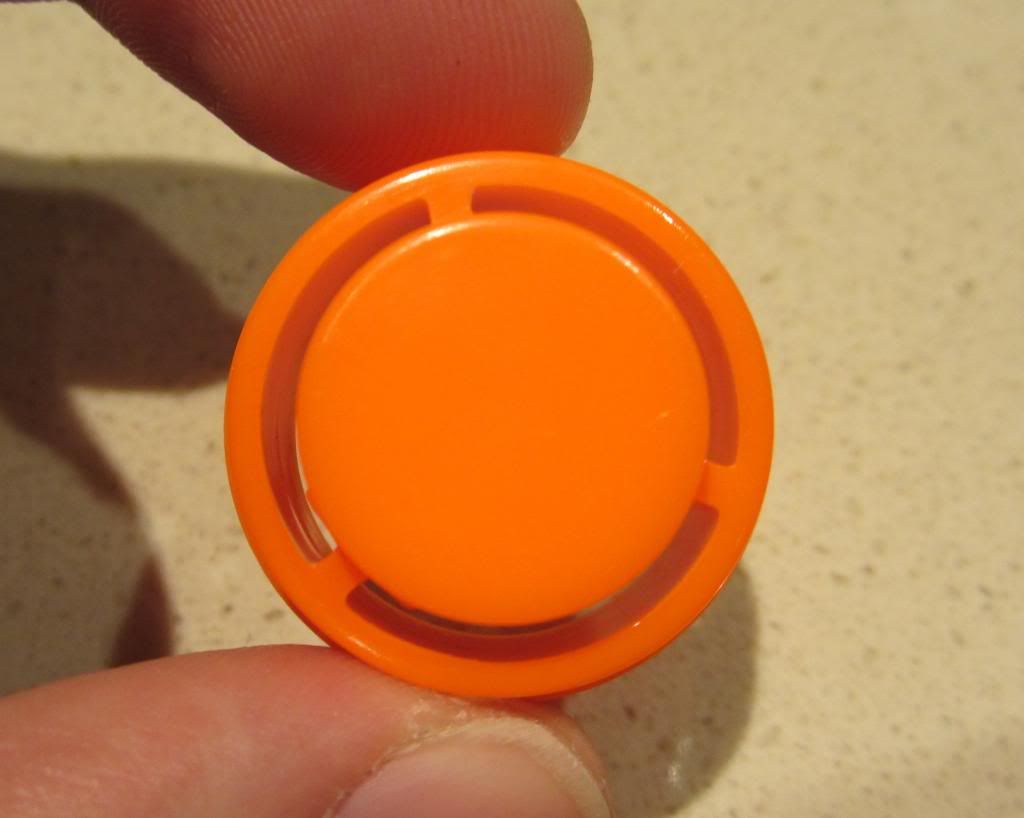
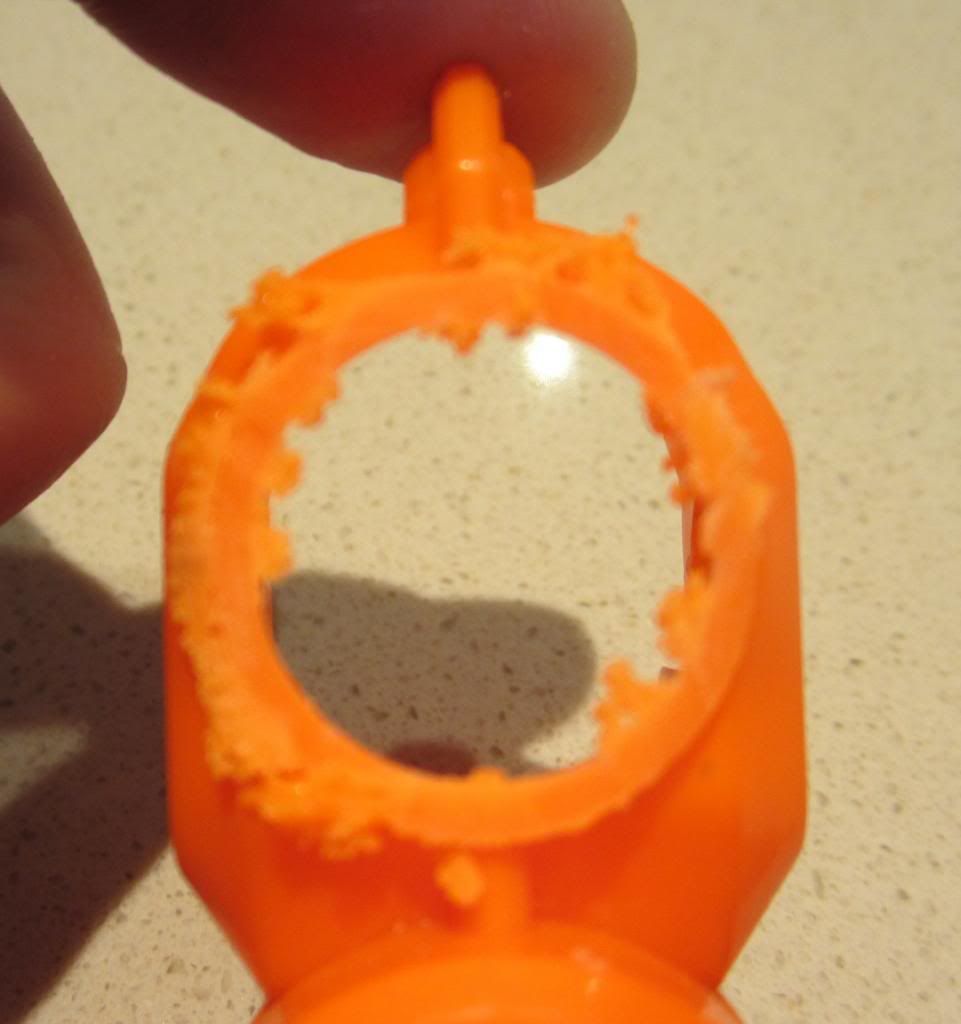
Start with the dart post piece (from now on Piece 1). Cut the 6 pieces of plastic holding the dart post to the main ring and discard the dart post. Using your knife and/or dremel with a sanding piece widen the opening till it's about 22mm in diameter. Set piece 1 away for later.
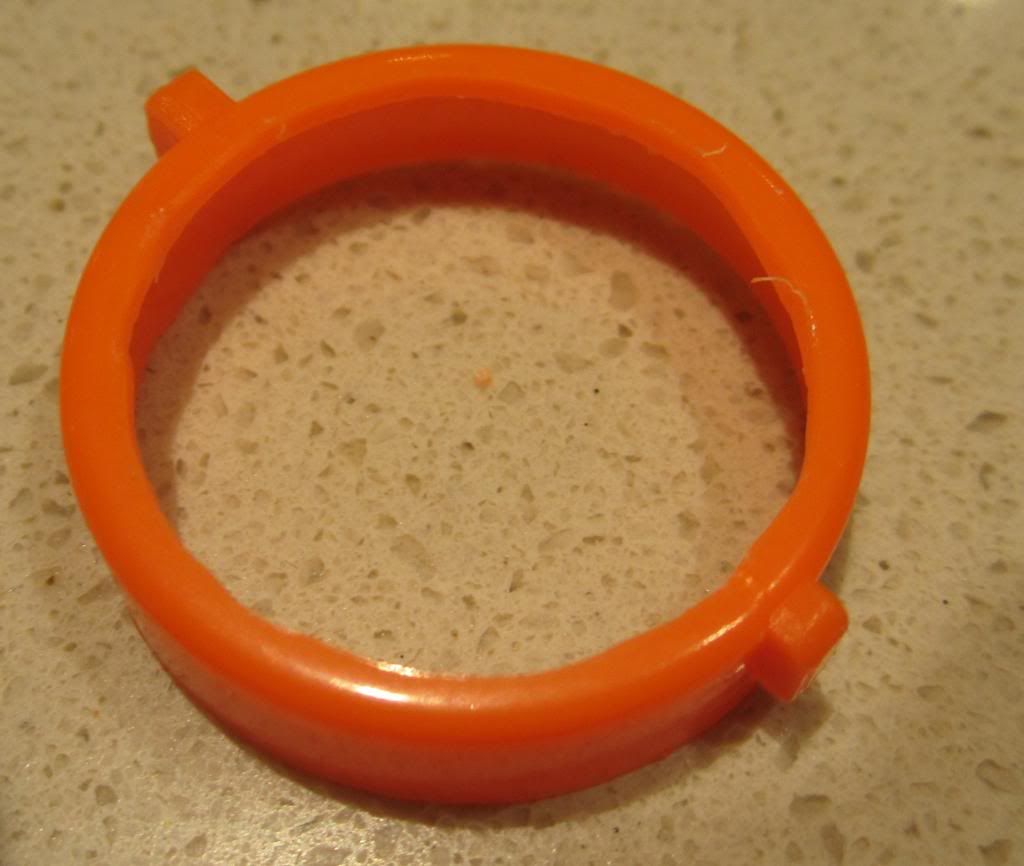
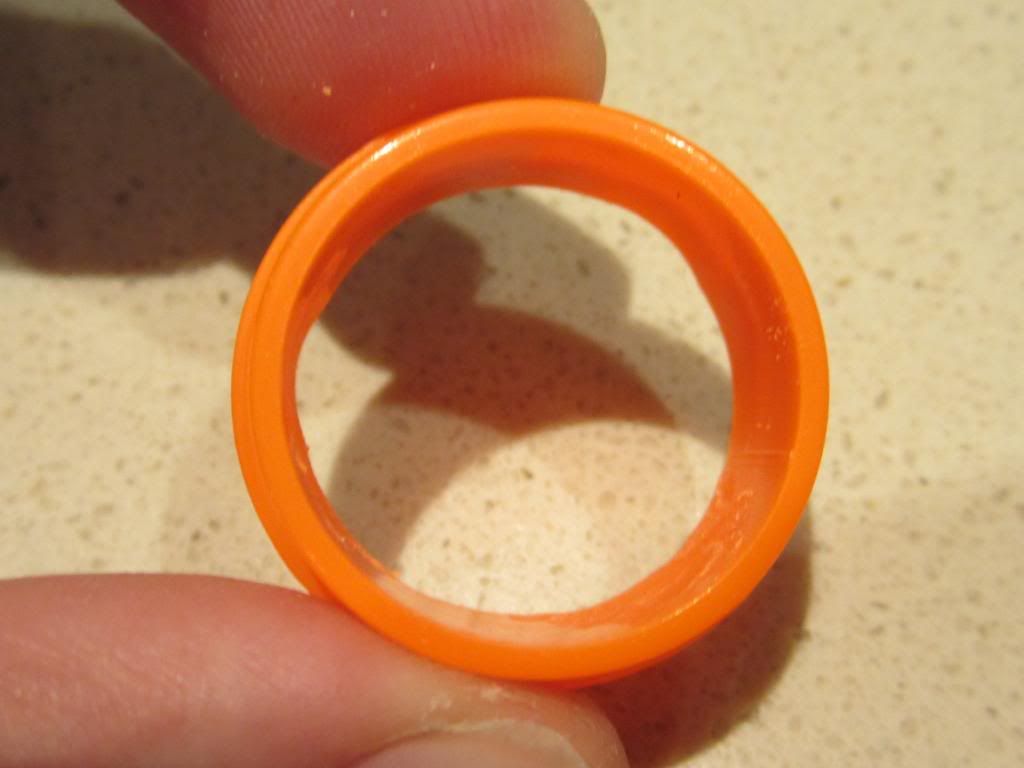
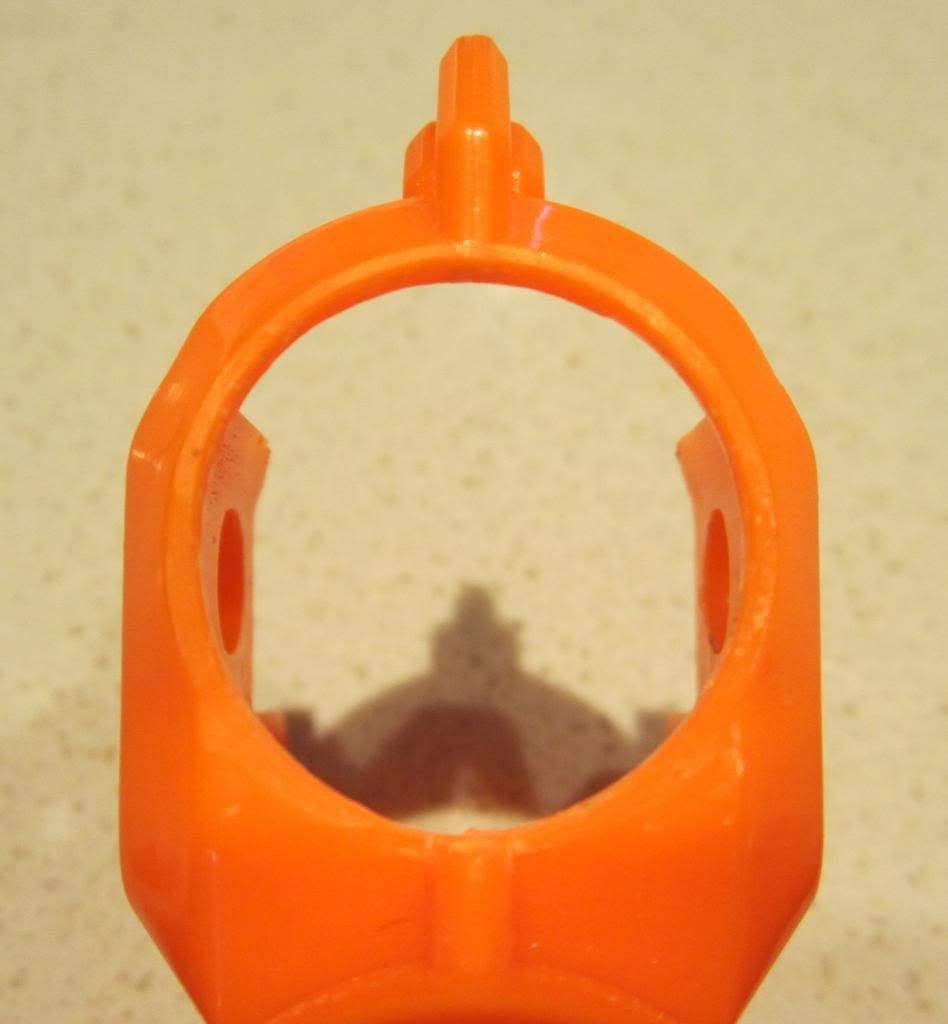
Next get this piece (piece 2) and using your dremel with a grinding bit remove the centre circle and smooth the inside of the ring. Set piece 2 aside for later.
Finally grab the barrel piece and cut off the barrel leaving only the base ring and the plunger-tube 'clips'. Use your dremel with a sanding bit to widen the centre of the ring until it's about 22mm in diameter. Set piece 3 aside for later.


Now grab a small piece (~50mm) of 20mm thickwall (orange) UPVC electrical conduit. Wrap it in E-tape until it fits snugly into piece 2, then epoxy it in place.

Next epoxy piece 1 onto piece 2 as shown.

Final piece 3 gets epoxied on top of piece 1 and 2 as shown. Now piss off for a couple hours and let the epoxy dry.
Cut and/or sand the 20mm conduit flush with piece 2 on the plunger-tube side of the combined piece 1, 2 & 3 (now known as PT-cap); also cut the E-tape that is protruding from the PT-cap off (sorry forgot to take a photo of this).

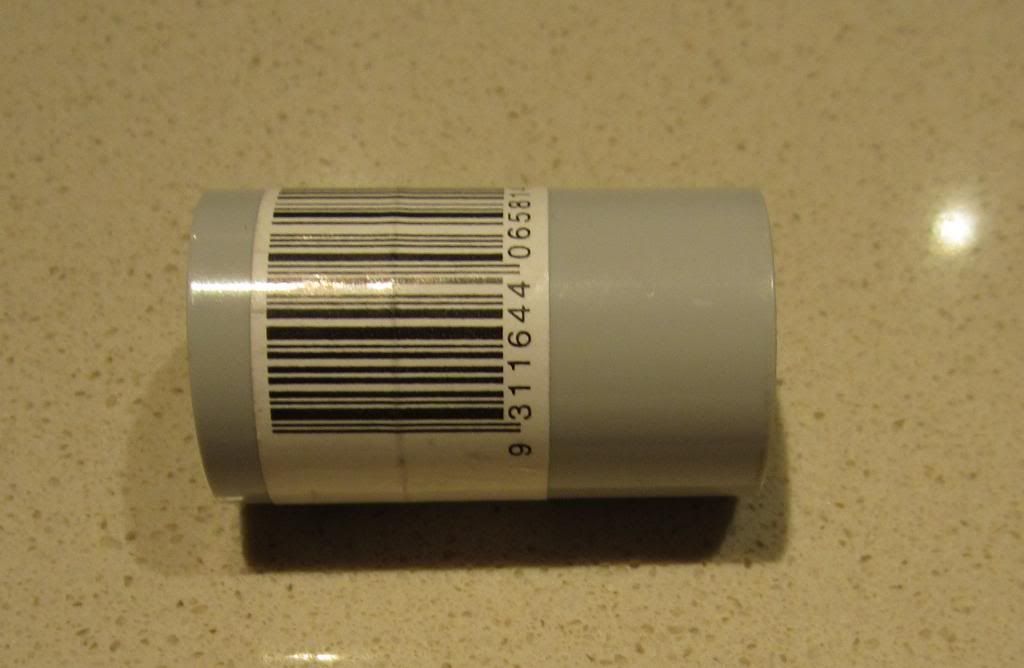
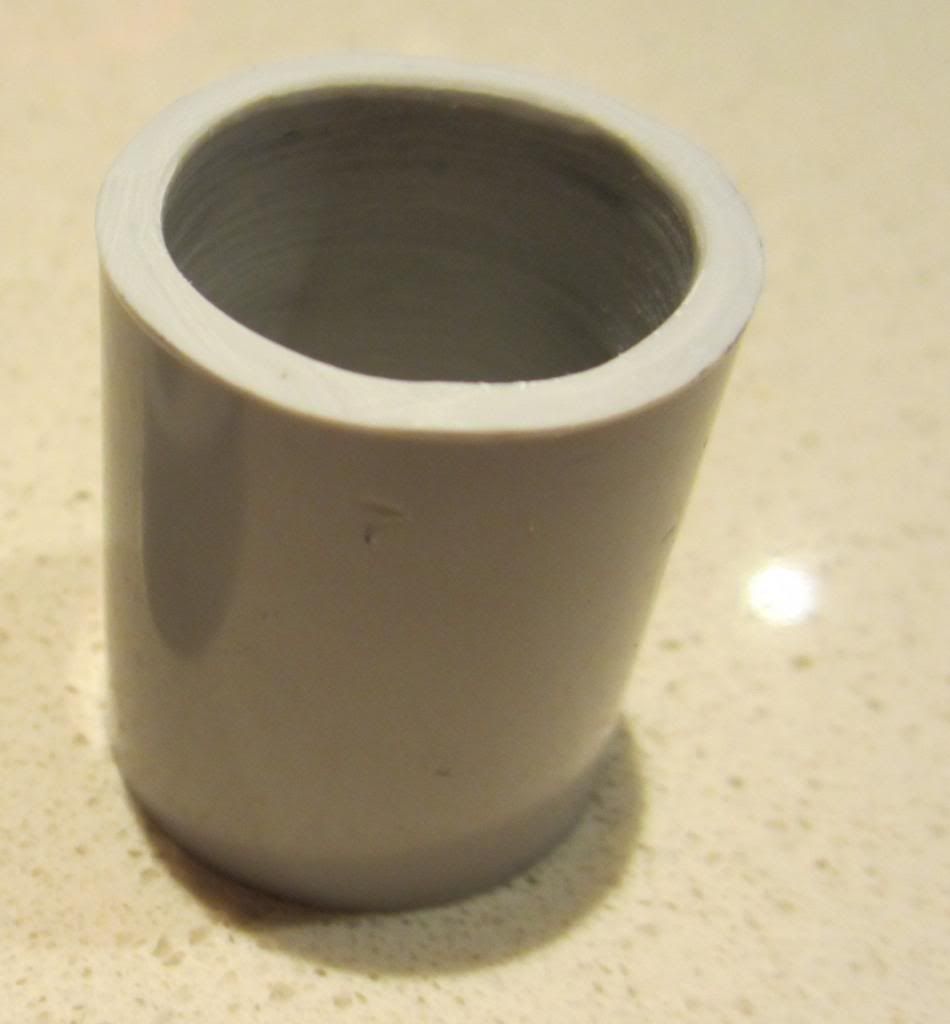
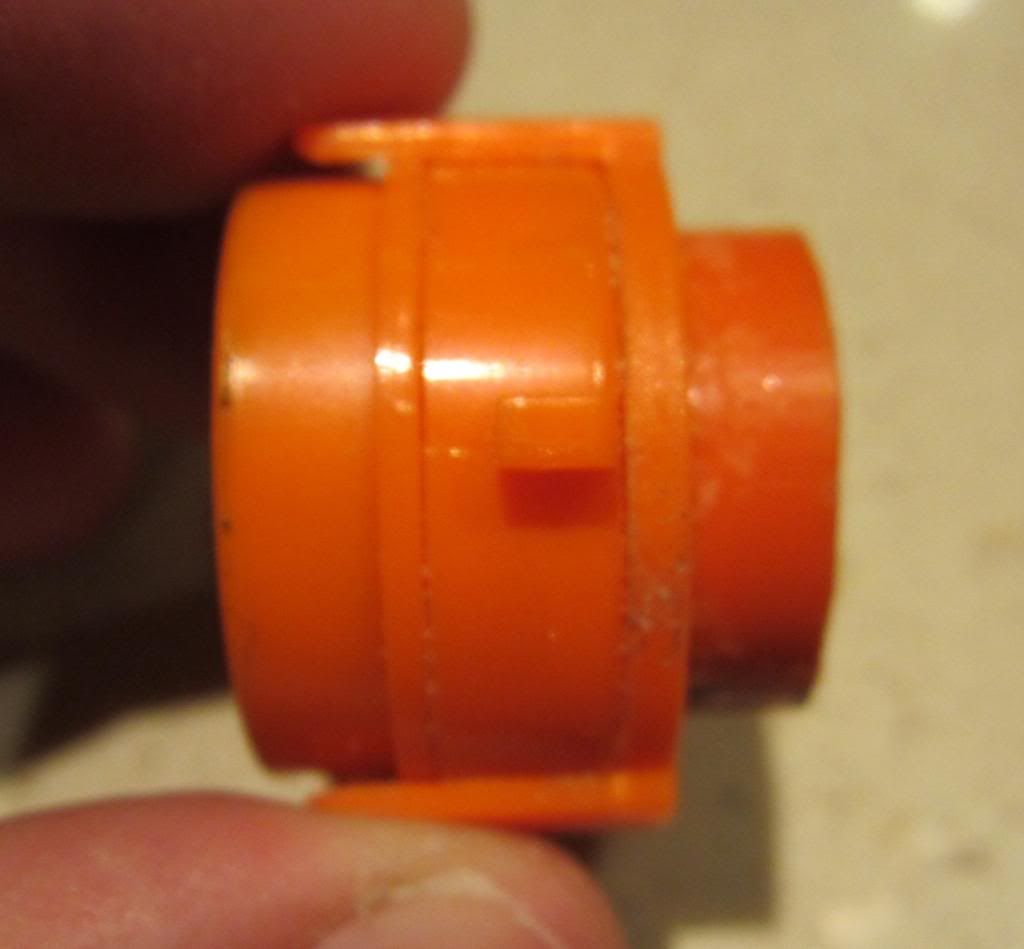
Next you'll need your 20mm UPVC electrical conduit coupler. Use your dremel to sand the inside of the coupler; you want to get rid of the centre 'ridge' and widen the coupler ever so slightly. You'll know you're done when you can just twist the whole coupler over 20mm conduit with your hands.

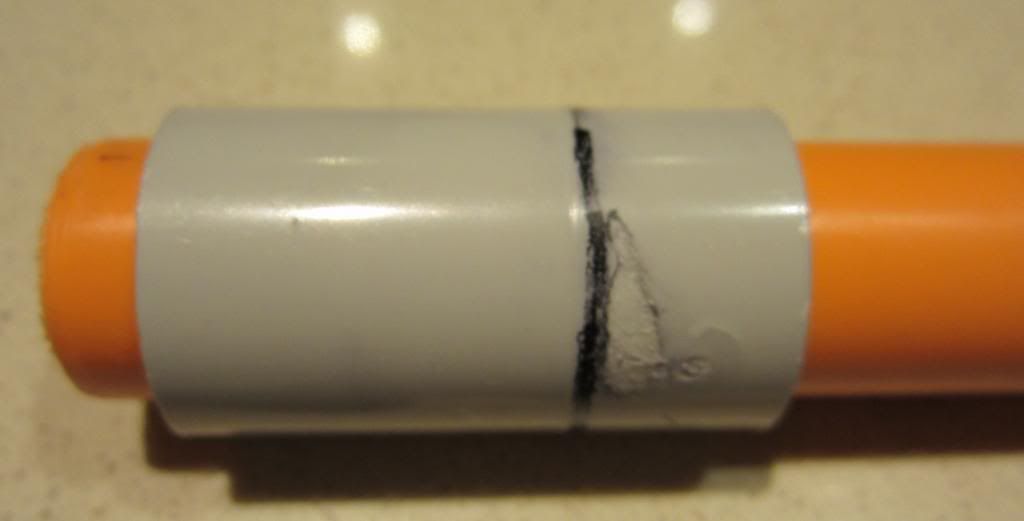
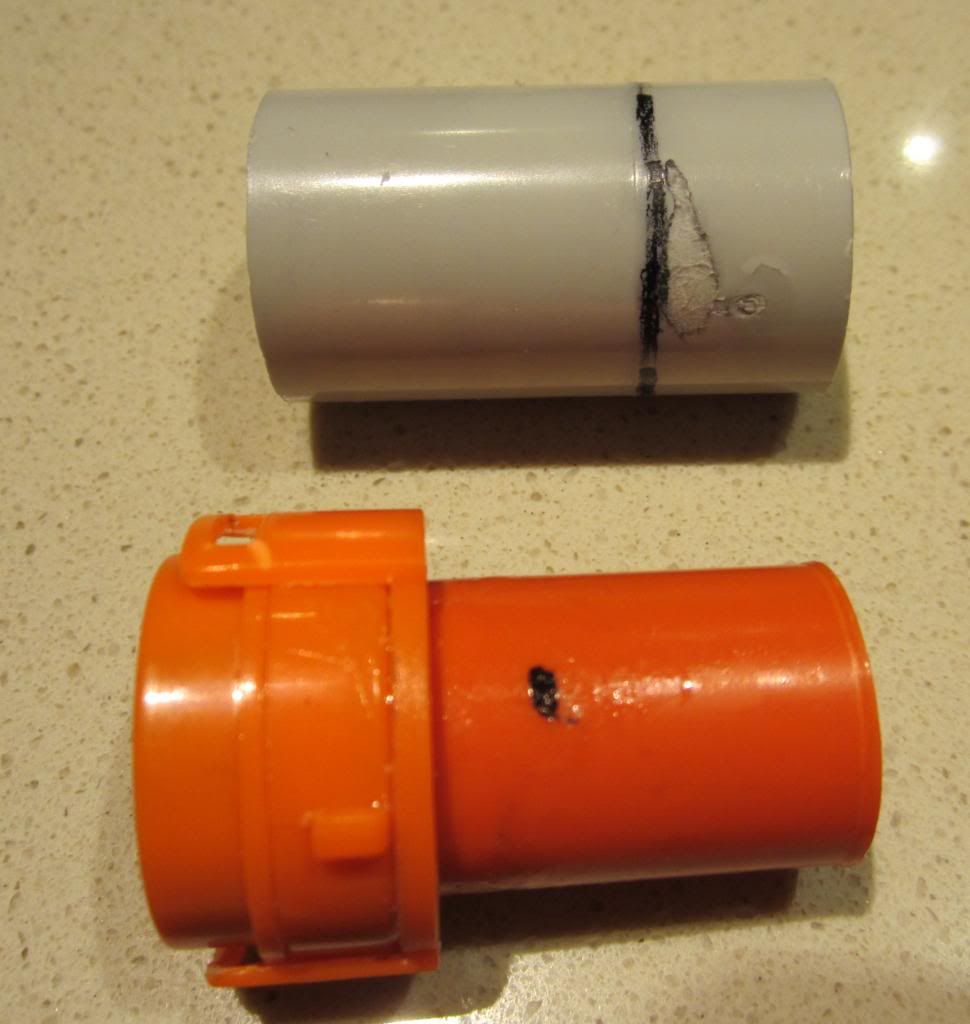
Next you'll need your coupler and PT-cap. Measure and mark the coupler 28mm from one end. On your PT-cap find where the 20mm UPVC protrudes from piece 3 of the PT-cap, then measure and mark 6mm from this point. Once the measurements are done cut and smooth both pieces; the smaller piece of coupler won't be needed and can be discarded.

Next you'll need a small piece (~50mm) of 16mm thin-walled (grey) UPVC electrical conduit. Using a dremel, files and/or sandpaper sand down the outside of the 16mm UPCV until it can be jammed into the 20mm UPVC stub in the PT-cap. Once it has been sanded down enough to fit, use plumbers goop to glue the 16mm UPVC into the 20mm UPVC leaving an overhang of 16mm UPVC on both sides of the PT-cap. Leave this piece for a few minutes to bond.

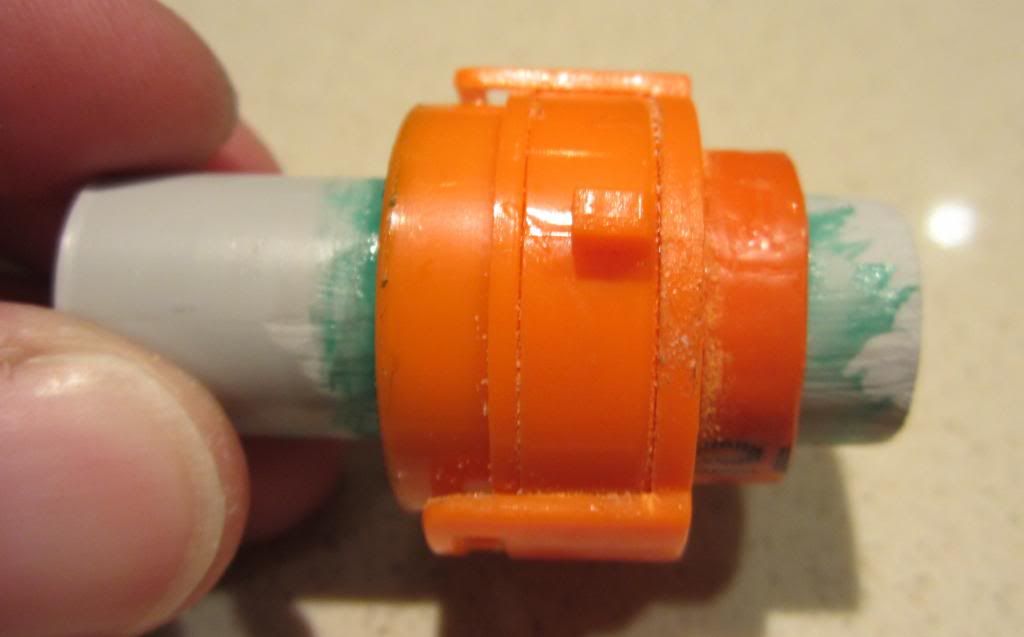
Next cut and sand the 16mm UPVC so that it is flush with the 20mm UPVC on both sides of the PT-cap.
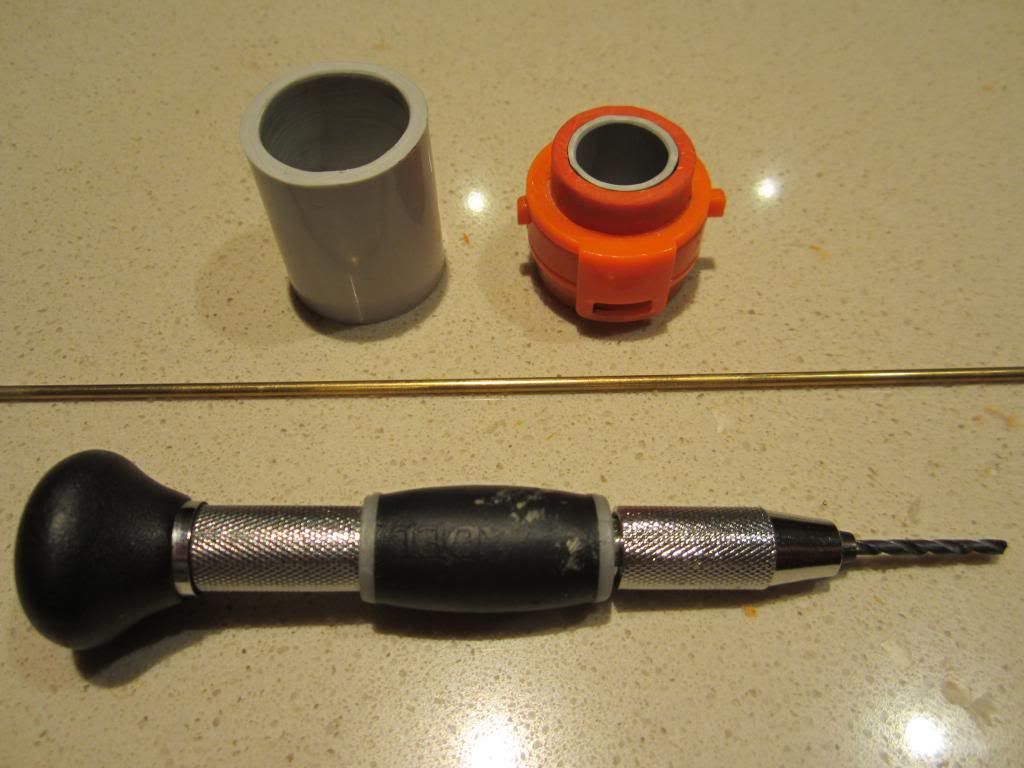
Next you'll need your cut down 20mm coupler, the PT-cap, some 2mm brass rod and a pinvice with a 2mm drill bit.
NOTE: Most of you miniature hobbyists will have a pinvice and brass rod lying around for pinning resin/pewter models, but if you don't have either and don't want to buy one; a drill with a small drill bit and a small nail will do.
Now dry-fit your coupler to the UPVC nub of the PT-cap and use your pinvice to drill a hole through the coupler and the UPVC nub then back out the other side as shown. Make sure the brass rod will fit through the holes.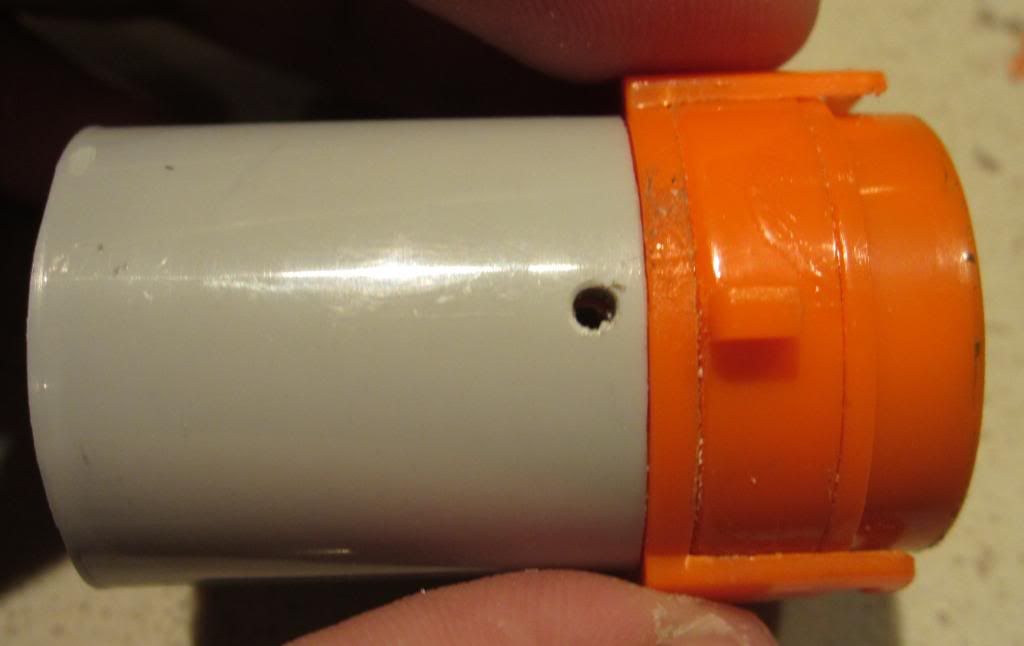
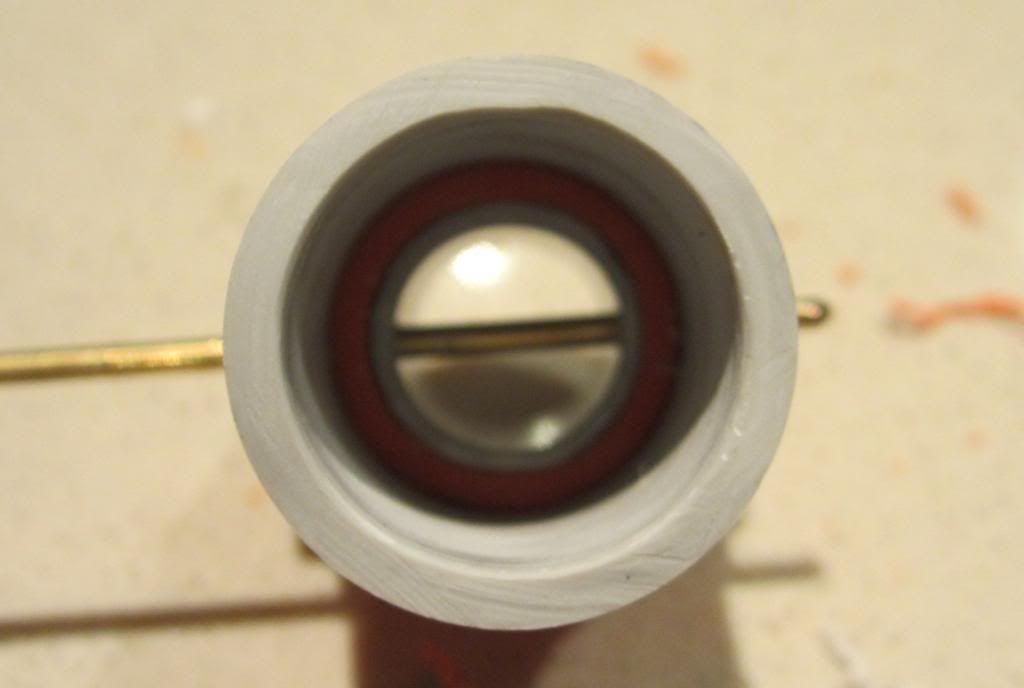
Next measure and cut a 24mm piece of 2mm brass rod. this piece should be the tiniest bit smaller than the diameter of the coupler.
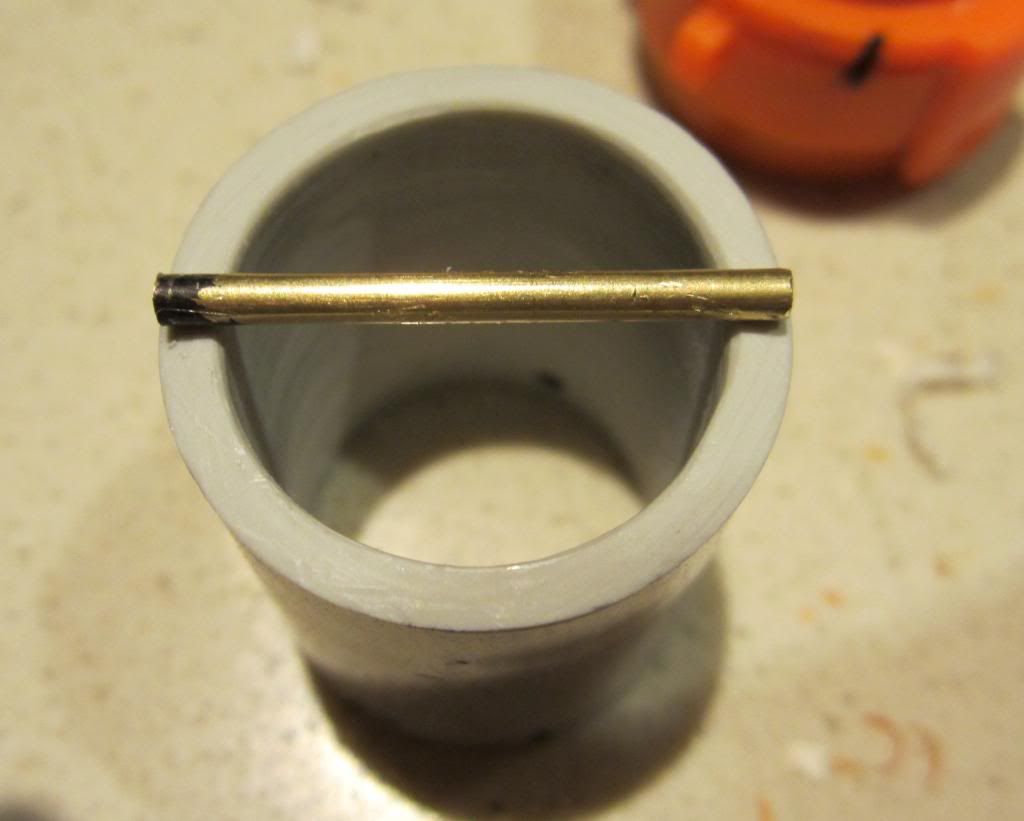
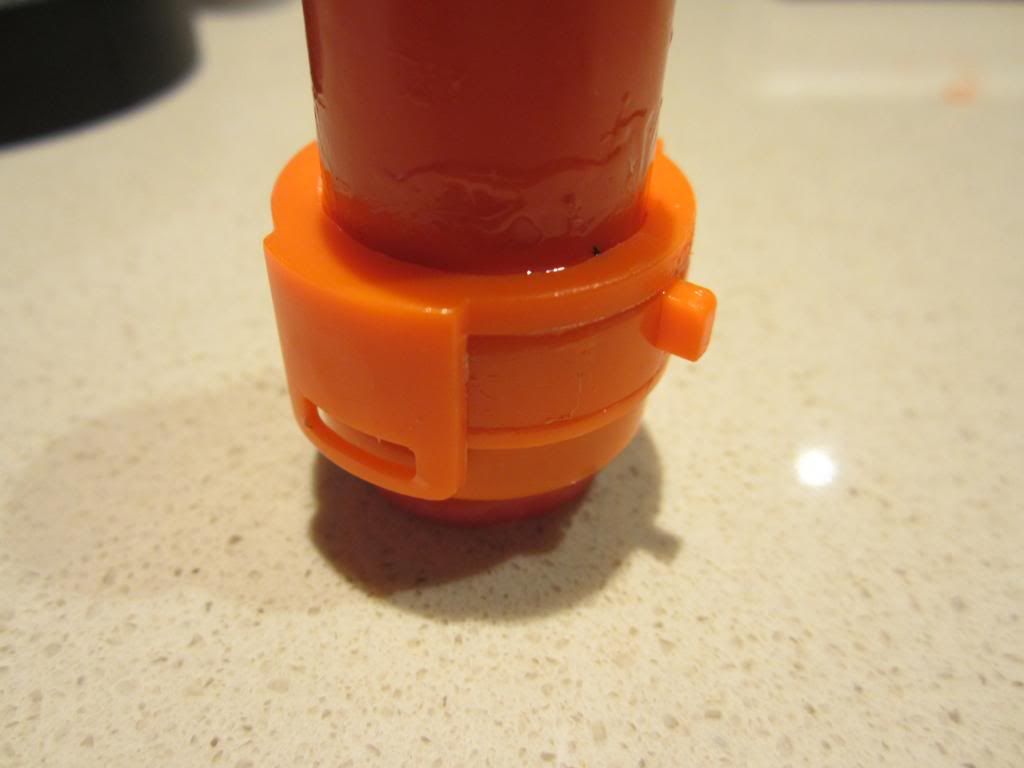
Now that all the pieces fit together nicely, epoxy the coupler to the PT-cap and then roll the brass rod in epoxy and stick it through the holes drilled for it as shown. The brass rod serves two purposes; firstly it anchors the coupler and the PT-cap together ensuring a very strong join and secondly it acts as a dart-stop.

Finally epoxy the Pt-cap onto the plunger-tube as shown. Leave this piece to dry for a few hours. Congratulations you now have a receiver for your inline clips!

Spring Addition:
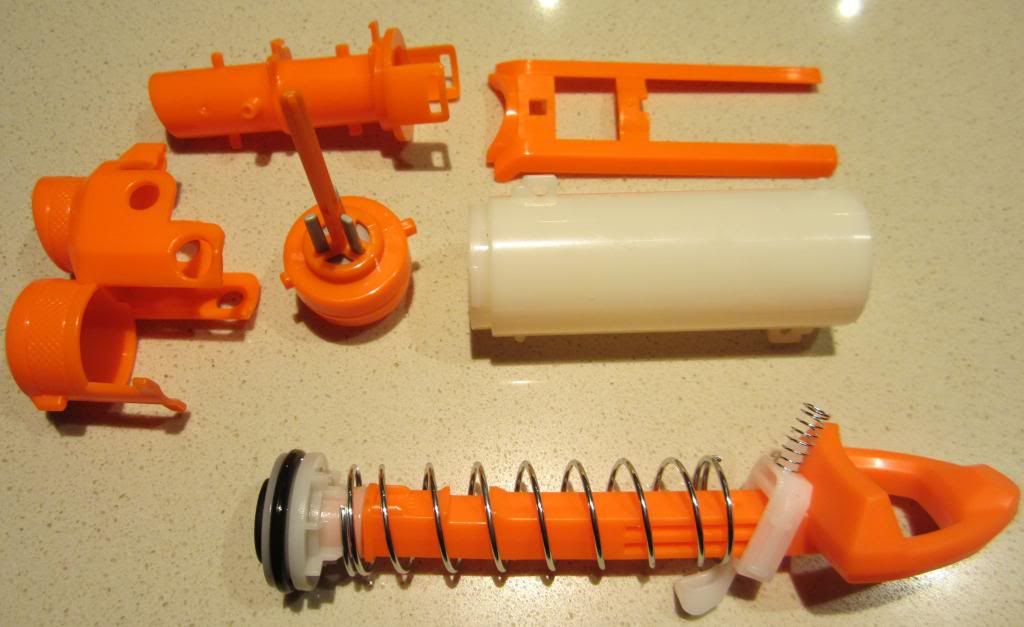
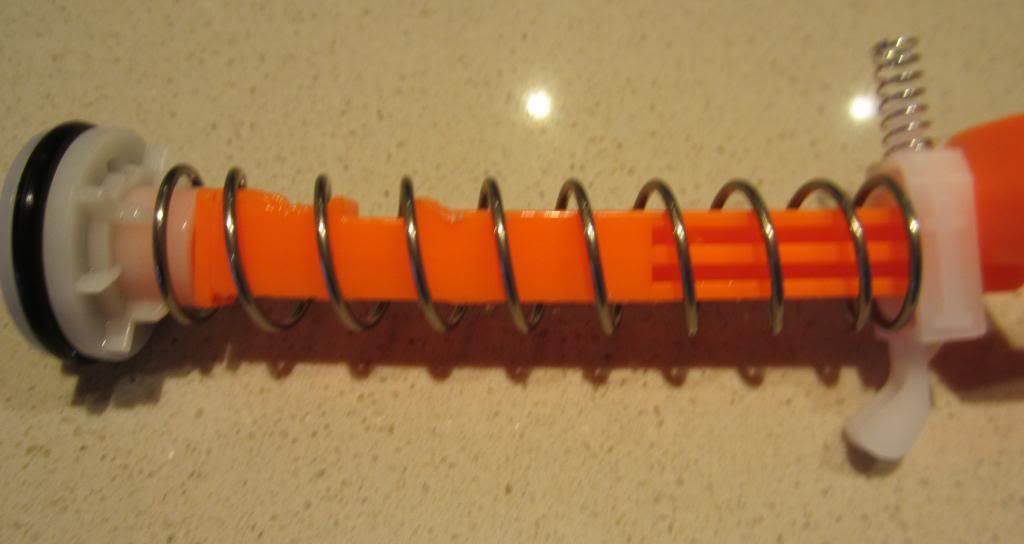
For the next part you'll need the Plunger-rod assembly. You should probably remove the catch spring and store it somewhere safe, as this next part involves lots of violence and cussing.
I didn't want to cut the plunger-rod to remove the spring, so I copied some of the other Firestrike mods and just twisted the spring off the plunger-rod using a pair of needle-nosed pliers. The hardest part is getting the tip of the spring off the plunger-rod, once you've done that the spring can be easily twisted off. The pictures explain the techniques better than text can.
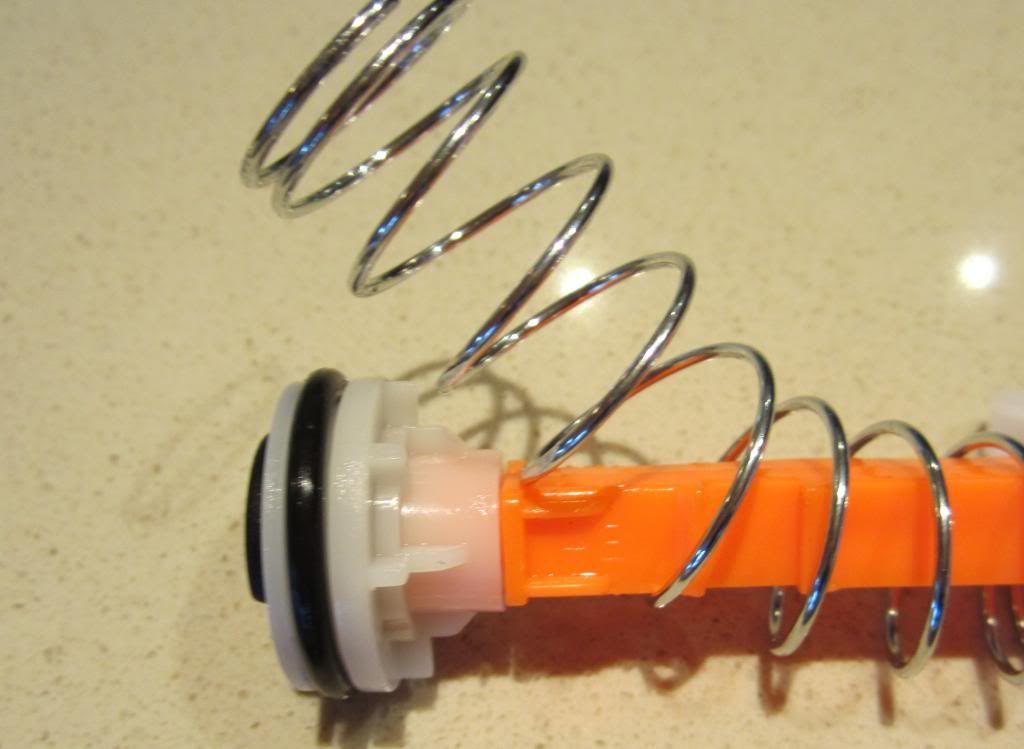
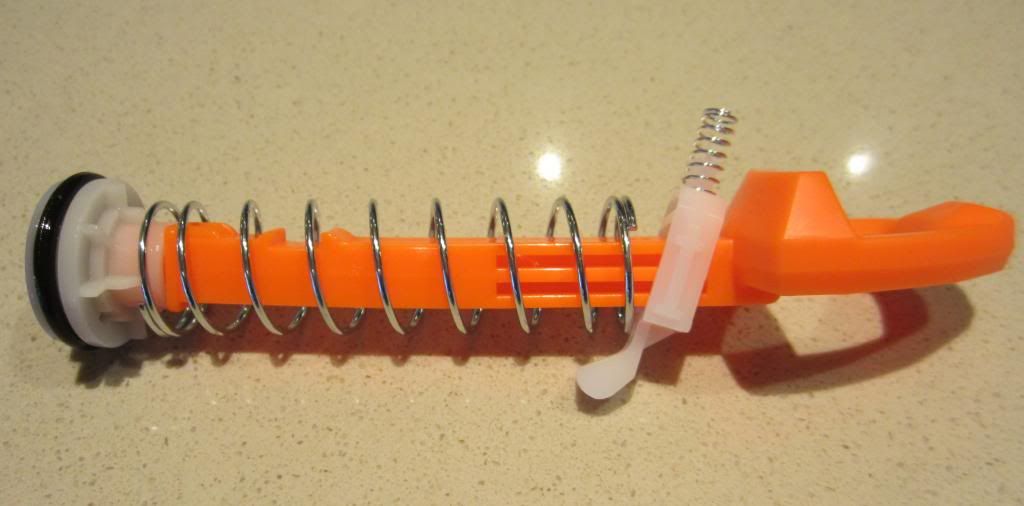
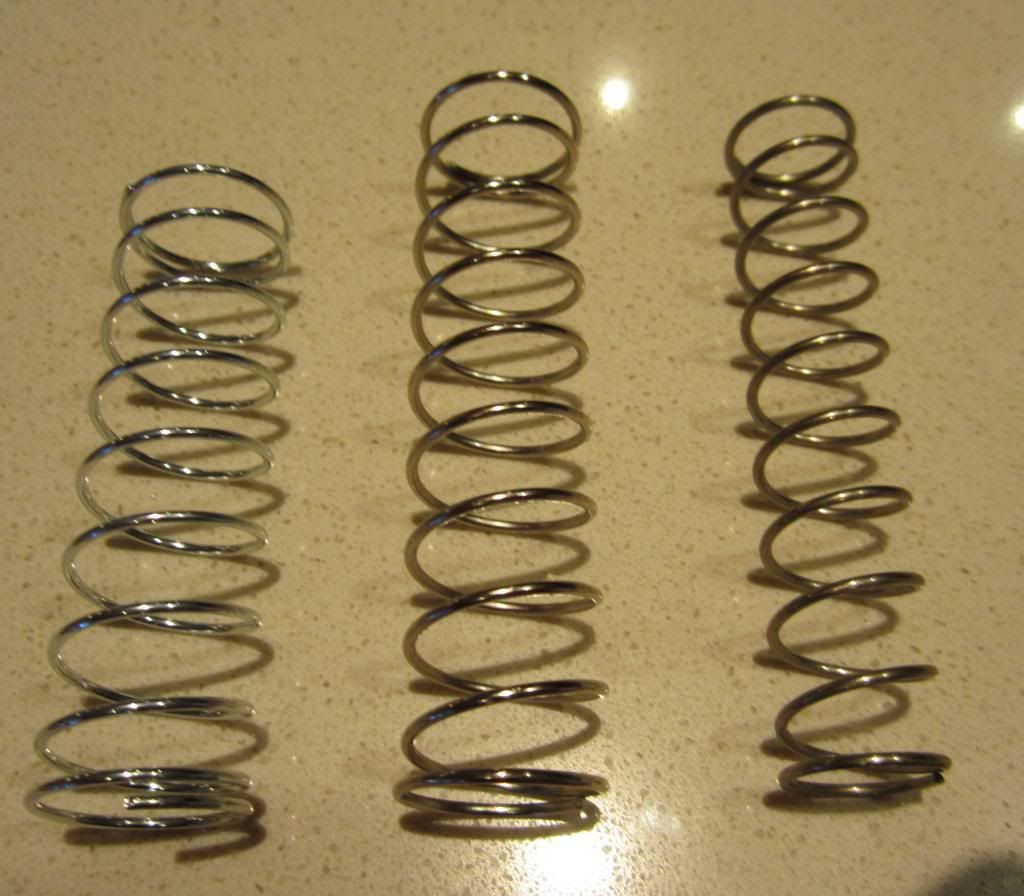
From Left to right we have a stock Firestrike spring (Australian version) followed by a stock Nitefinder spring and finally the 8kg SGNerf Retaliator/Rampage spring. I only used the SGNerf spring, but since it's a thin spring you could probably also keep the stock spring as well.
The new spring went on the same way the old one came off.

Once you're done put the catch spring back on and you're all done. I found that the stock catch spring was plenty strong enough to keep the blaster primed, even with the upgraded spring.
Shell mods and barrel straightener:
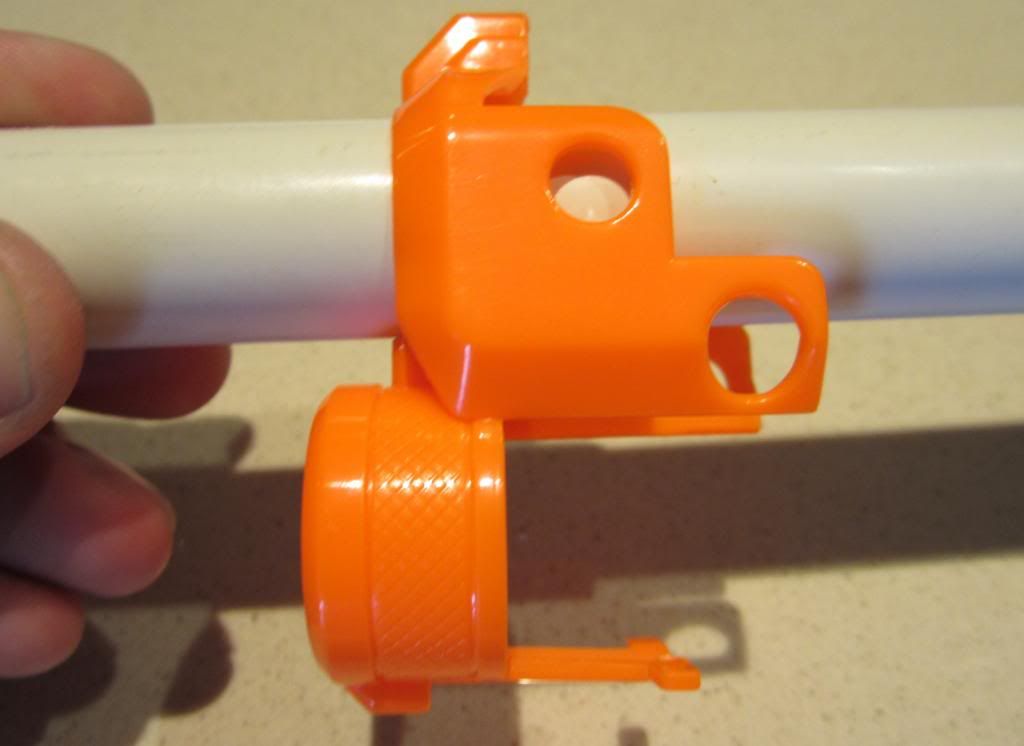
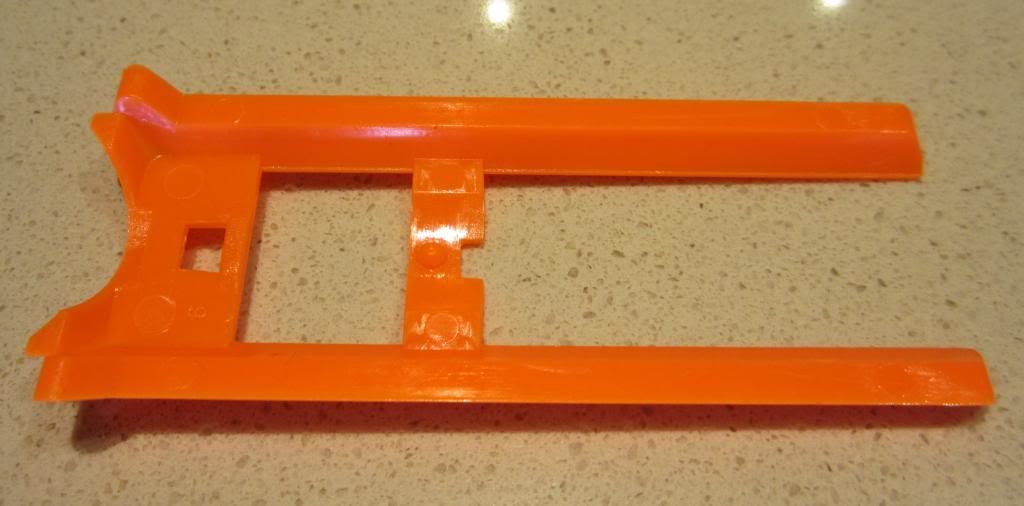
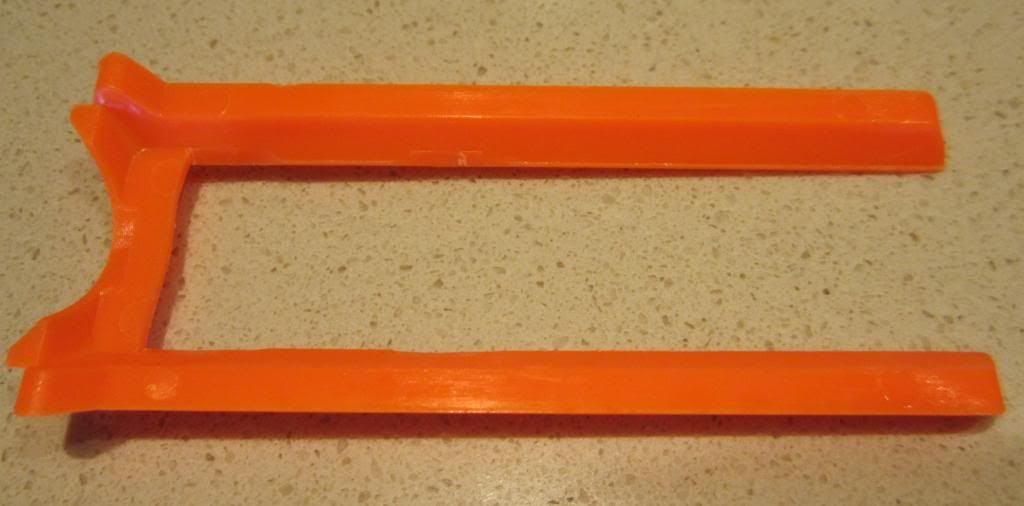
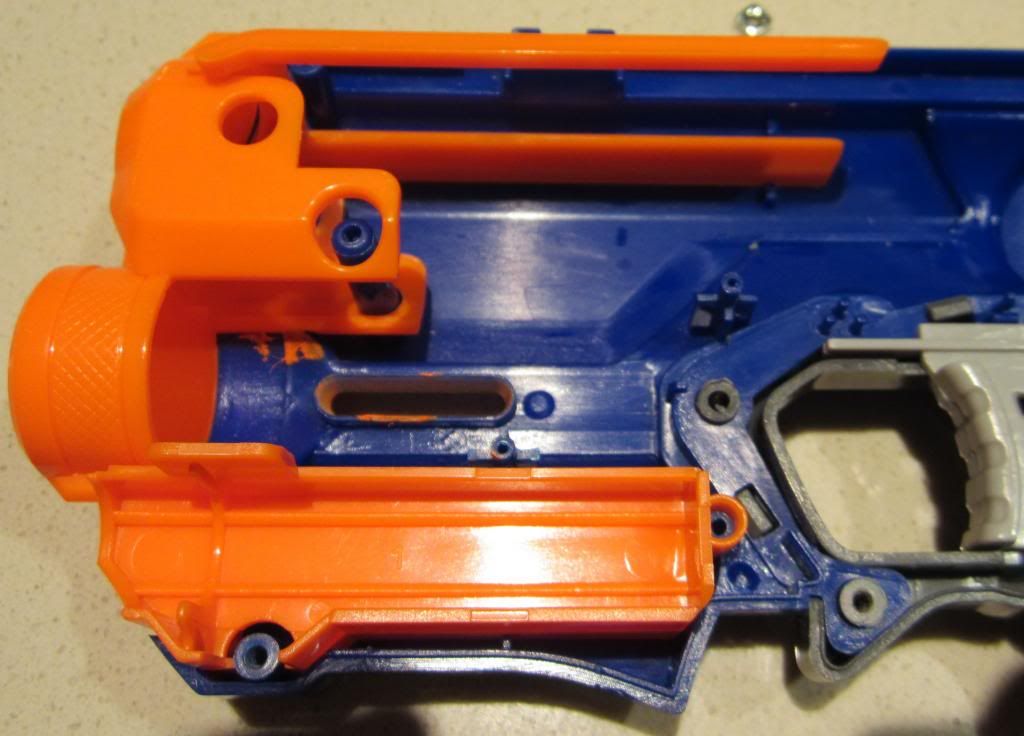
First you'll need the front barrel cover, which looks like this:
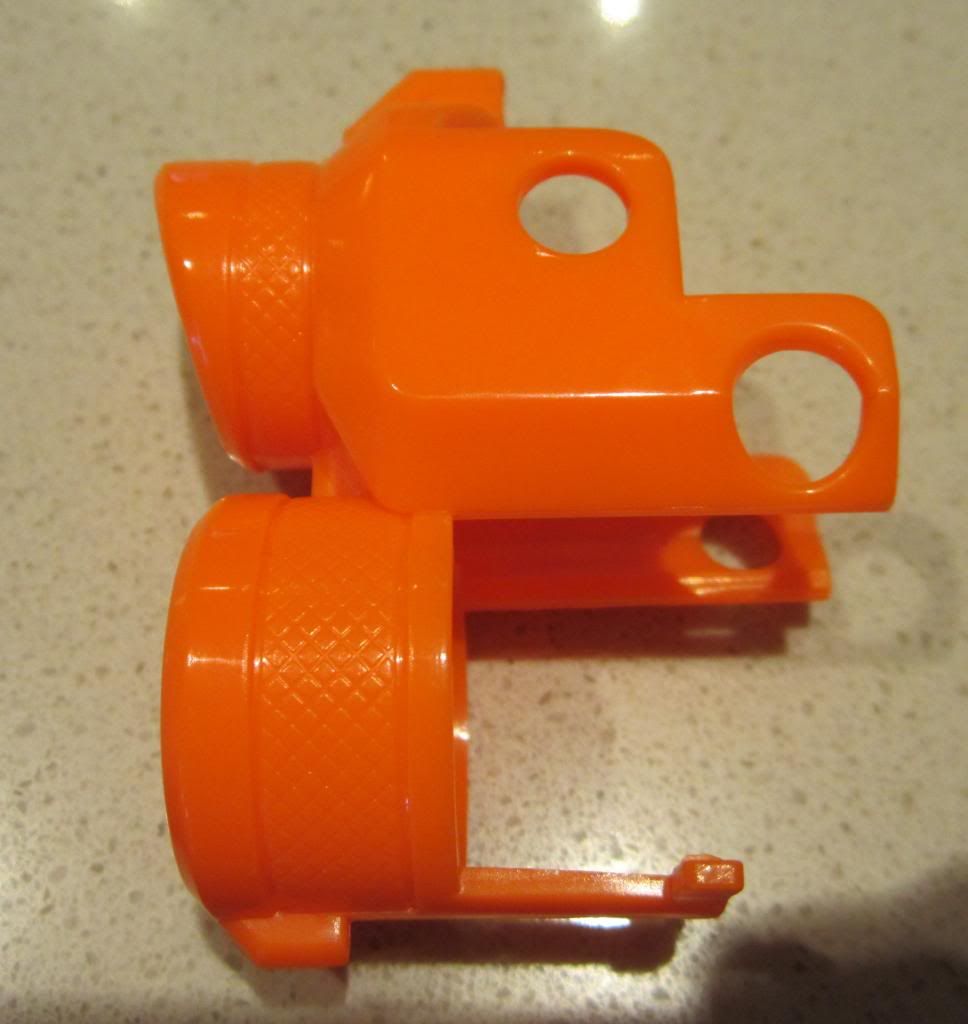
Firstly you want to use your dremel with a cutting disc to cut off the front 'barrel cover' till it is about flush with the rest of the piece. Then switch your dremel to a sanding bit and neaten up the front of the piece. Next you're going to want to widen the 'barrel opening' till it can just fit a piece of 20mm UPVC electrical conduit through it. Take your time as this hole needs to be centred as it acts as a guide to keep your barrel straight, you also don't want to make it too wide otherwise the barrel will have 'wiggle room' and won't stay straight.
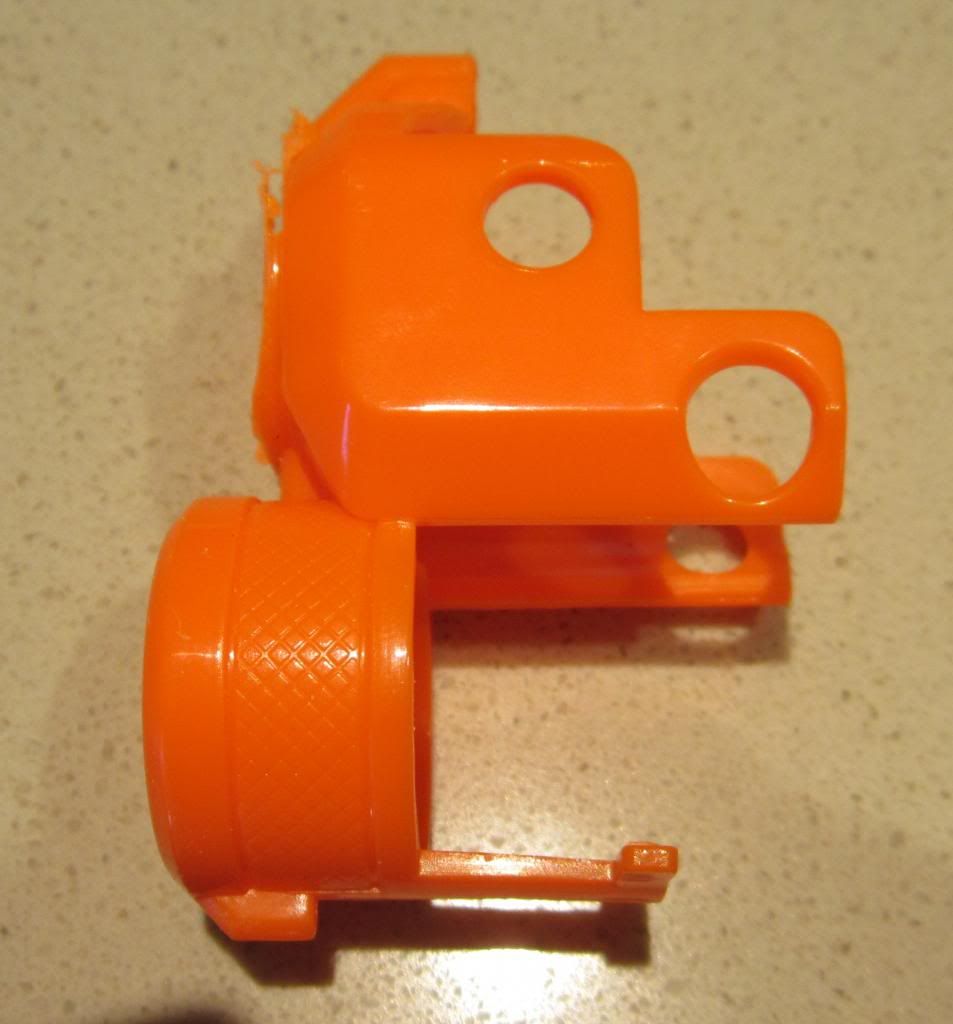
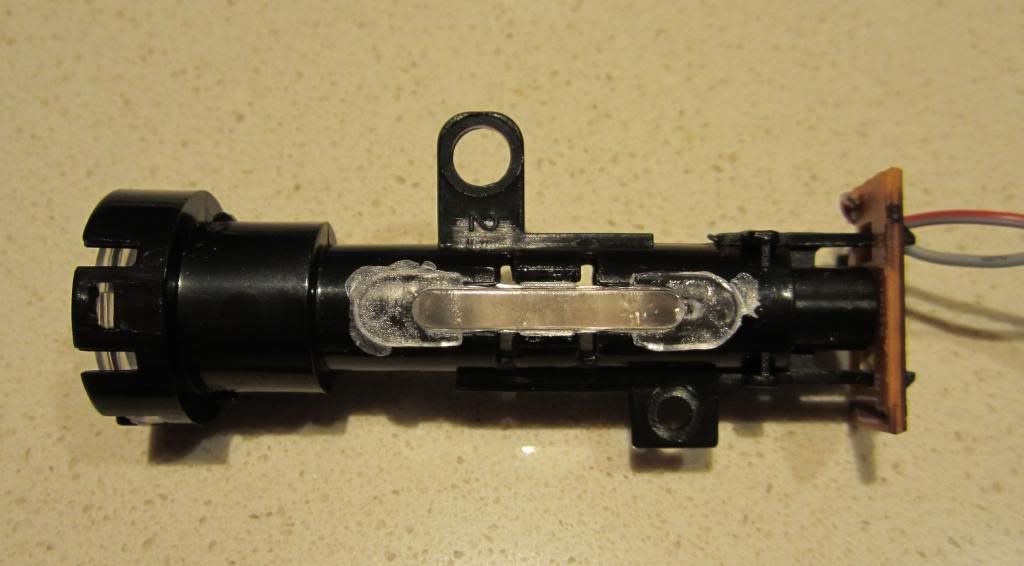
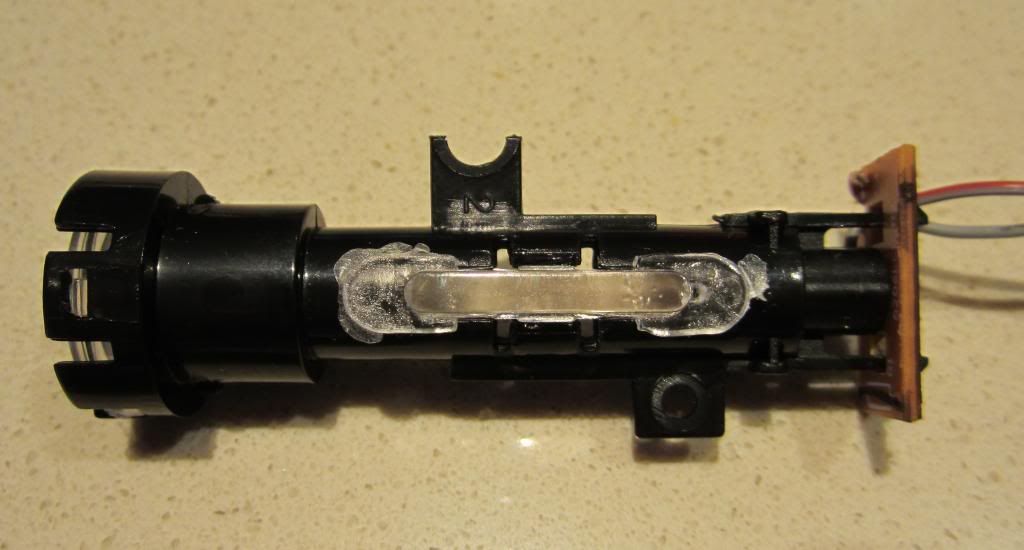
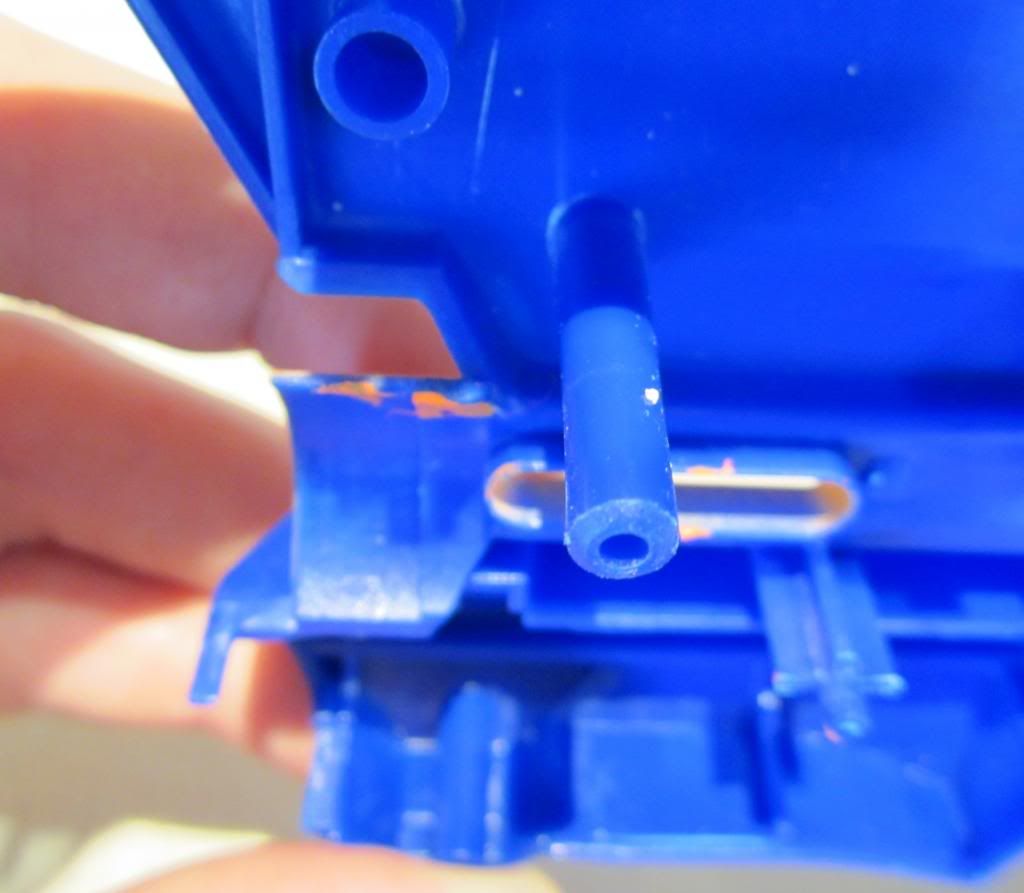
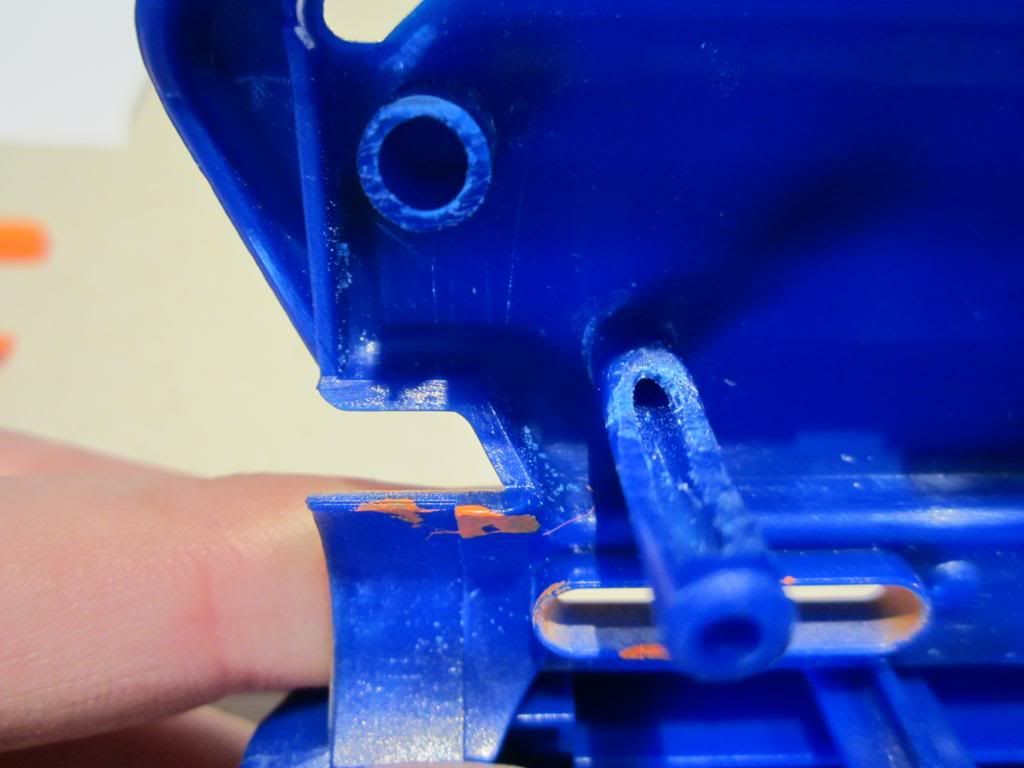
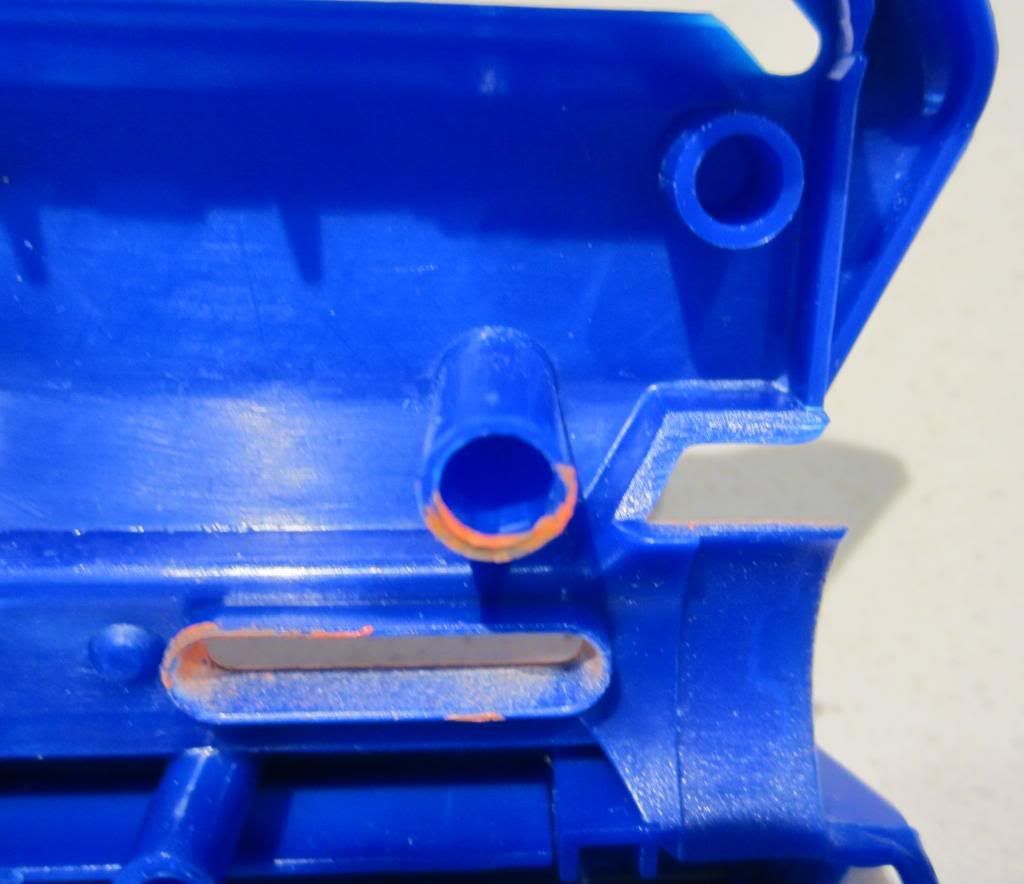
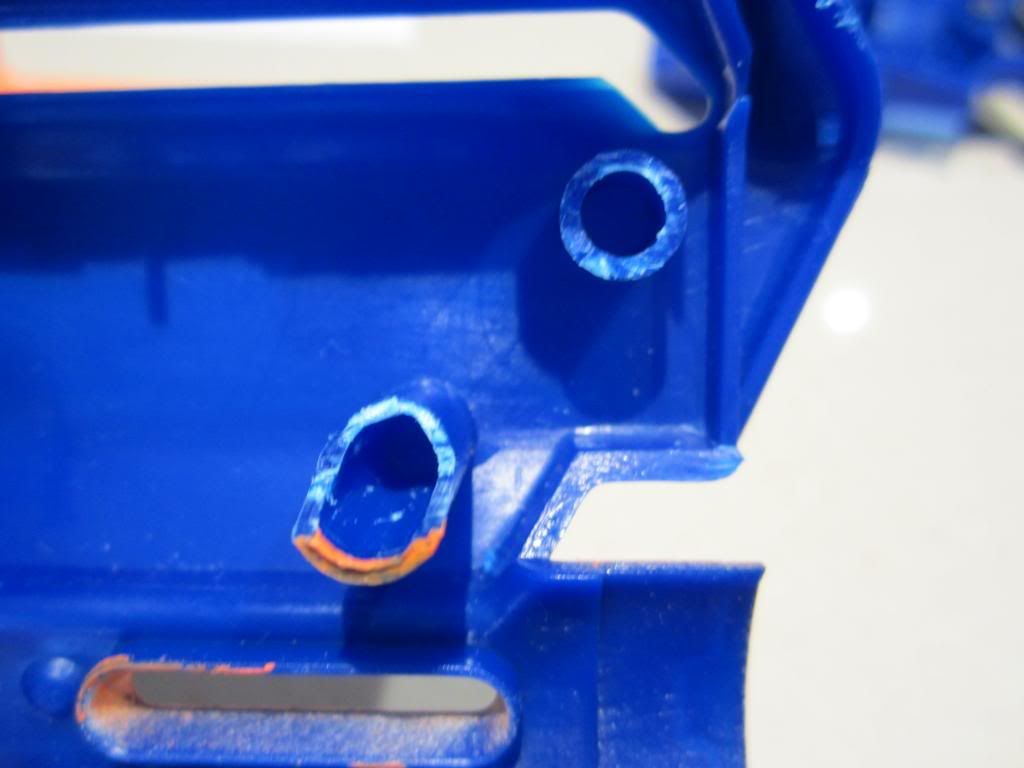
The next couple of steps are just sanding the shell to accommodate the new PT-cap, it's easier to just refer to the following before/after pictures to see what to sand down rather than me typing it out.

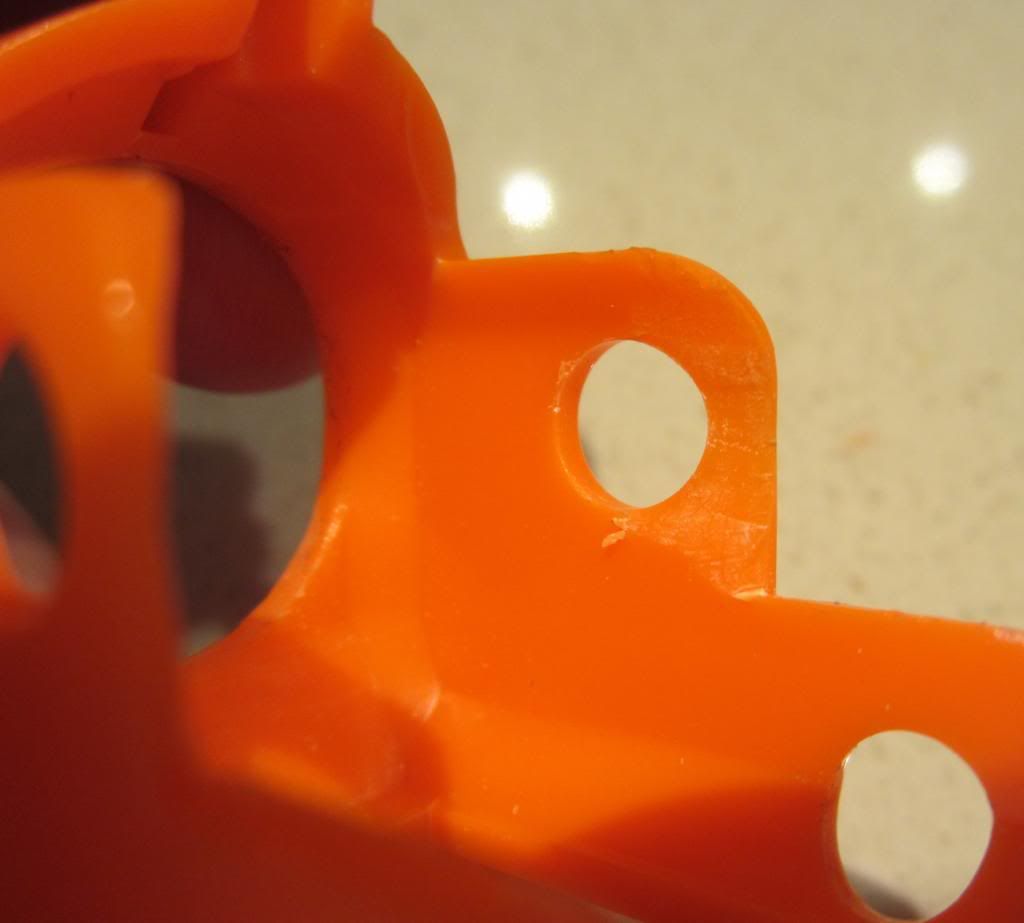
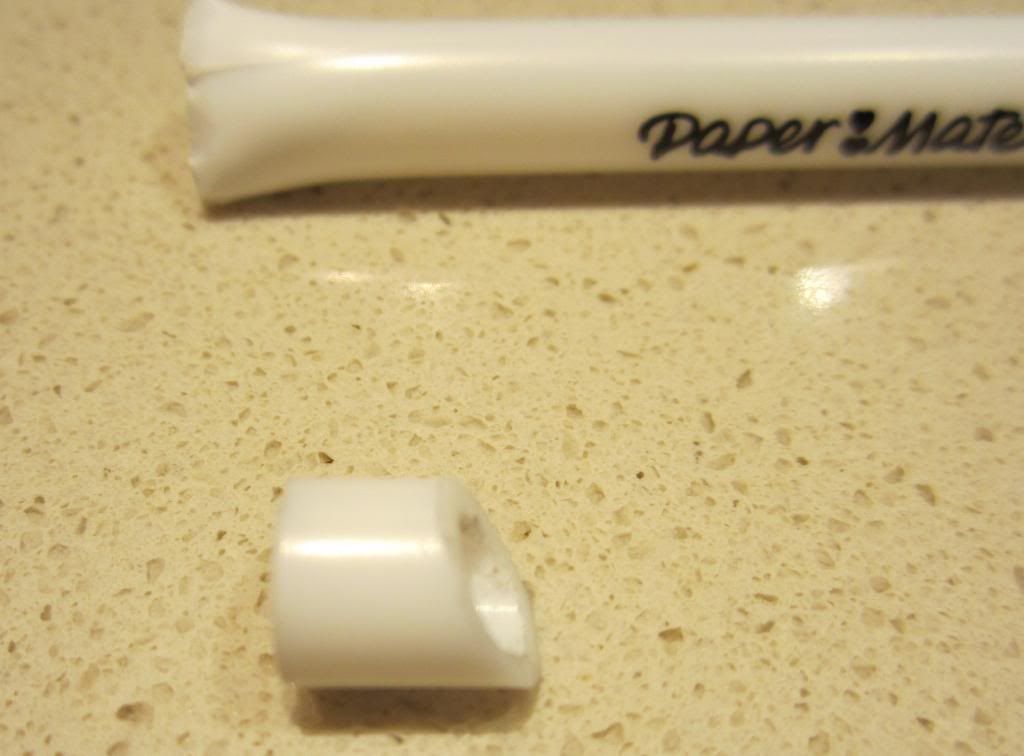
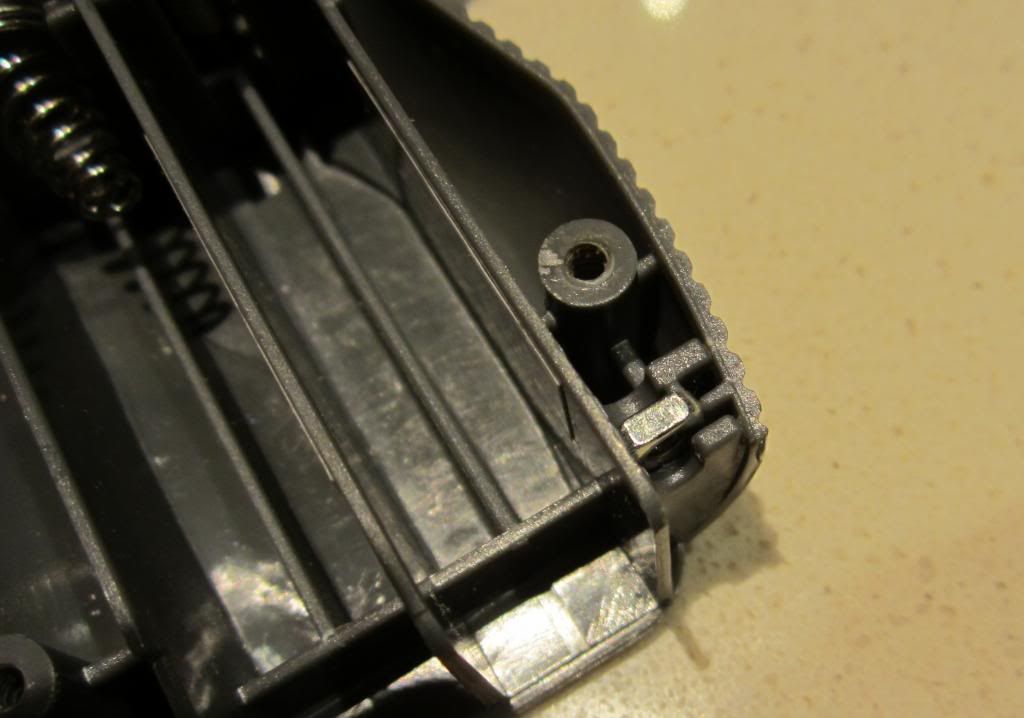
The final shell mod will require a Papermate ball point pen. Remove the tip and the ink tube-thing, then cut a small (~10mm) piece of the pen shell. Sand one side of this tube to be slightly angled as shown.
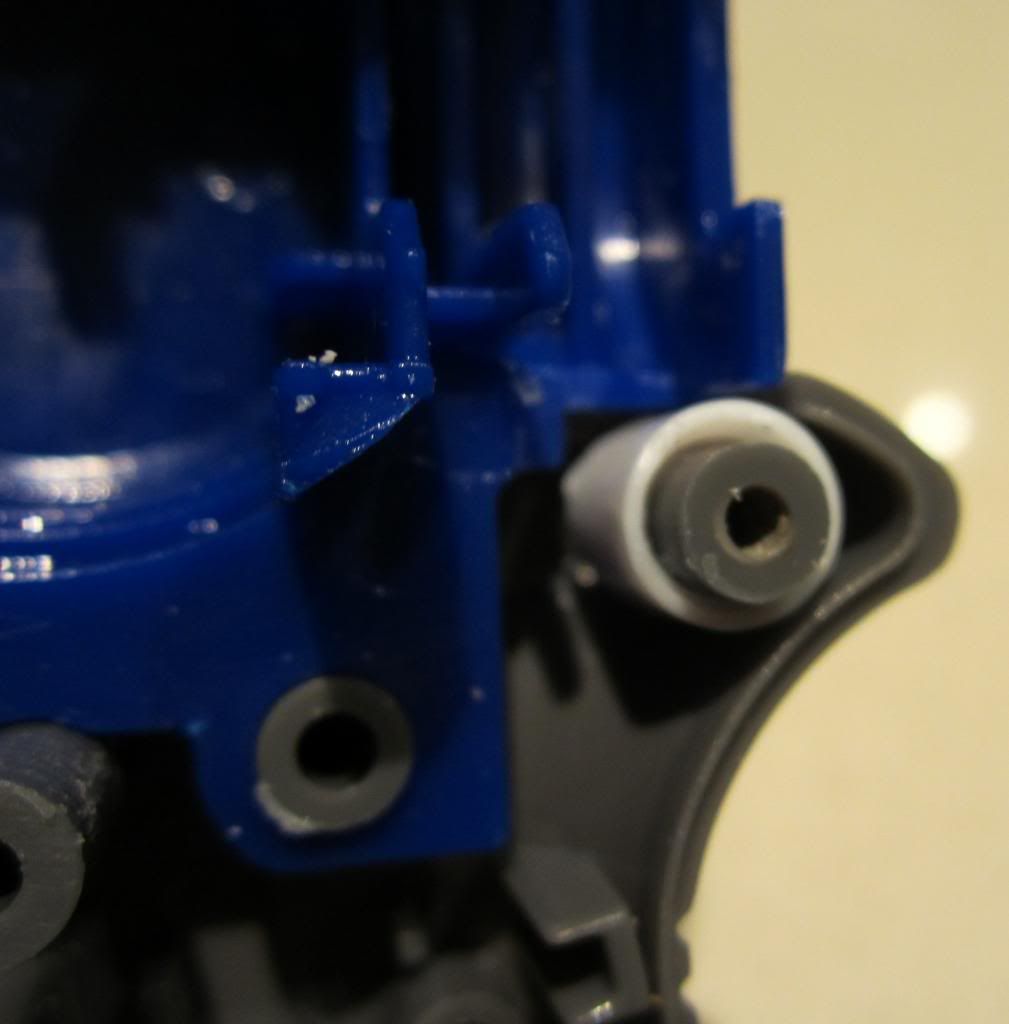
Next Just superglue the small nub of pen Over the back screw-port just under the catch. This stops part of the catch bending when you pull the trigger. This mod isn't essential if you haven't upgraded the catch spring, but I may do an extra spring edition & catch spring replacement down the road.
Reassembling the blaster:
The blaster goes together the same way it came apart, the only difference was that I didn't bother adding the red dot sight to the blaster. If you wish to keep the RDS all you have to do is cut off the piece that goes over the screw-port (sorry I forgot to take a picture).
The hardest part about reassembling the blaster is getting the spring to sit on the spring rest. I left the plunger-tube and plunger-rod till last and then, with the help of some pliers wrestled them in and closed the blaster up.
Making the clips:
My 'clips' will be made for use with small 25mm long silicone tipped darts. If I want to use different dart sizes or types I can just alter the design to compensate.
The first thing I made was a singled barrel. All I'm gonna post up are the design and the finished product as it's stupidly easy to make.

The second 'clip' I made was a four dart inline clip. I followed the standard Inline clip design with one slight difference. As the whole clip will be removed I added a small (5mm) piece of 16mm UPVC to the back of the clip. This piece of UPVC was beveled on one side, because the UPVC has a tight fit on darts and because of the bevel on the outer side it is very easy for darts to enter the clip (ie: from you loading them in) and very difficult for the darts to fall back out of the clip (whilst the clip is in your pocket). What this means is you can make multiple clips and store them in your pockets/kit for quick reloads during a match. It also means you can always have a full clip ready in your blaster whilst reloading another.
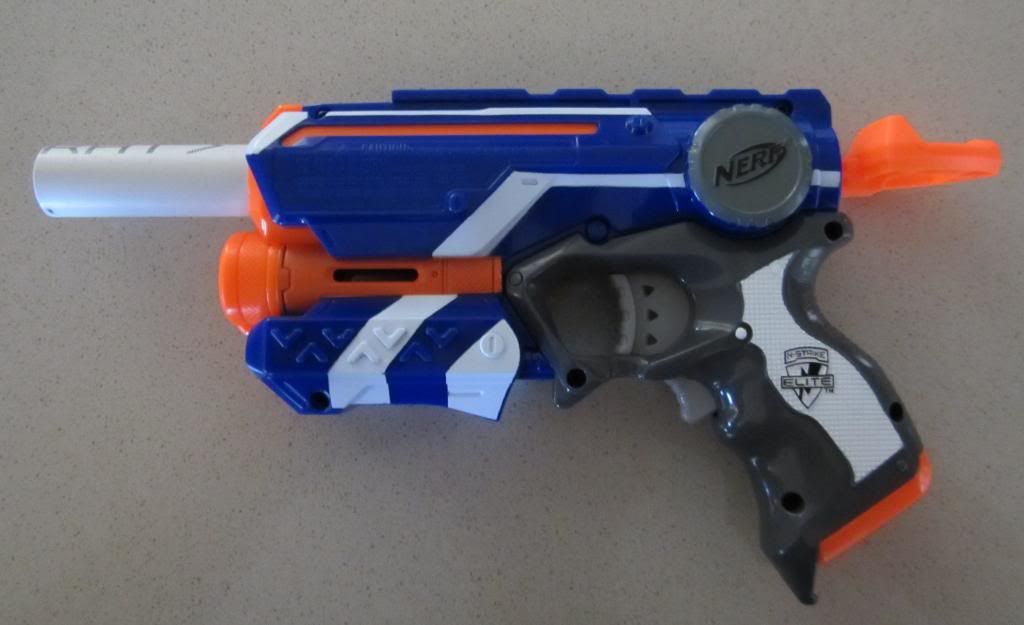
All done.

Basically to ‘tune up’ the Firestrike and give it a swappable inline clip system to dramatically increase it’s DPS, whilst keeping it as stock looking as possible. Since I'm an Australian nerfer, and have access to slightly different materials to work with I've included some alternative materials to the ones I've used.
Materials:
1x Firestrike (I used the Australian version, but any should do)
1x SGNerf 8kg Retaliator/Rampage replacement spring (or any suitable replacement spring)
1x 20mm UPVC electrical conduit coupler (could be substituted for a 1/2" PVC coupler instead)
1x Papermate ball point pen (almost any pen will do)
16mm UPVC thin-walled (grey) electrical conduit (could be substituted for 1/2" CPVC instead, 17/32" brass could be substituted for the barrel)
20mm UPVC thin-walled (grey) electrical conduit (could be substituted for 1/2" PVC instead)
20mm UPVC thick-walled (orange) electrical conduit (could be substituted for 1/2" PVC instead)
2mm brass rod (a small nail could be used instead)
Etape
Epoxy
Superglue
White lithium greese
Plumbers goop
Tools:
Dremel
Pipe Cutter
Screwdriver
Various knives (I used a hobby scalpel and a swiss army knife)
Needle Nosed Pliers
File
Sandpaper
Pinvice (a drill with a small drill-bit would suffice)
Disassembly:
Remove all the shell screws and open it up. All the screws seem to be the same, so you don't need to keep them in any kind of order. Try not to lose this little nut that holds the battery door on. Put it aside in a safe place.
AR Removal and clip reciever:
Grab your main assembly and pull it apart.
Firstly you need this piece that contains the AR and acts as the plunger-tube cap.
Use a knife to pry it open at the seem. It's not glued together so it should just come apart.
These are what we want. Discard the air restrictor.
Start with the dart post piece (from now on Piece 1). Cut the 6 pieces of plastic holding the dart post to the main ring and discard the dart post. Using your knife and/or dremel with a sanding piece widen the opening till it's about 22mm in diameter. Set piece 1 away for later.
Next get this piece (piece 2) and using your dremel with a grinding bit remove the centre circle and smooth the inside of the ring. Set piece 2 aside for later.
Finally grab the barrel piece and cut off the barrel leaving only the base ring and the plunger-tube 'clips'. Use your dremel with a sanding bit to widen the centre of the ring until it's about 22mm in diameter. Set piece 3 aside for later.
Now grab a small piece (~50mm) of 20mm thickwall (orange) UPVC electrical conduit. Wrap it in E-tape until it fits snugly into piece 2, then epoxy it in place.
Next epoxy piece 1 onto piece 2 as shown.
Final piece 3 gets epoxied on top of piece 1 and 2 as shown. Now piss off for a couple hours and let the epoxy dry.
Cut and/or sand the 20mm conduit flush with piece 2 on the plunger-tube side of the combined piece 1, 2 & 3 (now known as PT-cap); also cut the E-tape that is protruding from the PT-cap off (sorry forgot to take a photo of this).
Next you'll need your 20mm UPVC electrical conduit coupler. Use your dremel to sand the inside of the coupler; you want to get rid of the centre 'ridge' and widen the coupler ever so slightly. You'll know you're done when you can just twist the whole coupler over 20mm conduit with your hands.
Next you'll need your coupler and PT-cap. Measure and mark the coupler 28mm from one end. On your PT-cap find where the 20mm UPVC protrudes from piece 3 of the PT-cap, then measure and mark 6mm from this point. Once the measurements are done cut and smooth both pieces; the smaller piece of coupler won't be needed and can be discarded.
Next you'll need a small piece (~50mm) of 16mm thin-walled (grey) UPVC electrical conduit. Using a dremel, files and/or sandpaper sand down the outside of the 16mm UPCV until it can be jammed into the 20mm UPVC stub in the PT-cap. Once it has been sanded down enough to fit, use plumbers goop to glue the 16mm UPVC into the 20mm UPVC leaving an overhang of 16mm UPVC on both sides of the PT-cap. Leave this piece for a few minutes to bond.
Next cut and sand the 16mm UPVC so that it is flush with the 20mm UPVC on both sides of the PT-cap.
Next you'll need your cut down 20mm coupler, the PT-cap, some 2mm brass rod and a pinvice with a 2mm drill bit.
NOTE: Most of you miniature hobbyists will have a pinvice and brass rod lying around for pinning resin/pewter models, but if you don't have either and don't want to buy one; a drill with a small drill bit and a small nail will do.
Now dry-fit your coupler to the UPVC nub of the PT-cap and use your pinvice to drill a hole through the coupler and the UPVC nub then back out the other side as shown. Make sure the brass rod will fit through the holes.
Next measure and cut a 24mm piece of 2mm brass rod. this piece should be the tiniest bit smaller than the diameter of the coupler.
Now that all the pieces fit together nicely, epoxy the coupler to the PT-cap and then roll the brass rod in epoxy and stick it through the holes drilled for it as shown. The brass rod serves two purposes; firstly it anchors the coupler and the PT-cap together ensuring a very strong join and secondly it acts as a dart-stop.
Finally epoxy the Pt-cap onto the plunger-tube as shown. Leave this piece to dry for a few hours. Congratulations you now have a receiver for your inline clips!
Spring Addition:
For the next part you'll need the Plunger-rod assembly. You should probably remove the catch spring and store it somewhere safe, as this next part involves lots of violence and cussing.
I didn't want to cut the plunger-rod to remove the spring, so I copied some of the other Firestrike mods and just twisted the spring off the plunger-rod using a pair of needle-nosed pliers. The hardest part is getting the tip of the spring off the plunger-rod, once you've done that the spring can be easily twisted off. The pictures explain the techniques better than text can.
From Left to right we have a stock Firestrike spring (Australian version) followed by a stock Nitefinder spring and finally the 8kg SGNerf Retaliator/Rampage spring. I only used the SGNerf spring, but since it's a thin spring you could probably also keep the stock spring as well.
The new spring went on the same way the old one came off.
Once you're done put the catch spring back on and you're all done. I found that the stock catch spring was plenty strong enough to keep the blaster primed, even with the upgraded spring.
Shell mods and barrel straightener:
First you'll need the front barrel cover, which looks like this:
Firstly you want to use your dremel with a cutting disc to cut off the front 'barrel cover' till it is about flush with the rest of the piece. Then switch your dremel to a sanding bit and neaten up the front of the piece. Next you're going to want to widen the 'barrel opening' till it can just fit a piece of 20mm UPVC electrical conduit through it. Take your time as this hole needs to be centred as it acts as a guide to keep your barrel straight, you also don't want to make it too wide otherwise the barrel will have 'wiggle room' and won't stay straight.
The next couple of steps are just sanding the shell to accommodate the new PT-cap, it's easier to just refer to the following before/after pictures to see what to sand down rather than me typing it out.
The final shell mod will require a Papermate ball point pen. Remove the tip and the ink tube-thing, then cut a small (~10mm) piece of the pen shell. Sand one side of this tube to be slightly angled as shown.
Next Just superglue the small nub of pen Over the back screw-port just under the catch. This stops part of the catch bending when you pull the trigger. This mod isn't essential if you haven't upgraded the catch spring, but I may do an extra spring edition & catch spring replacement down the road.
Reassembling the blaster:
The blaster goes together the same way it came apart, the only difference was that I didn't bother adding the red dot sight to the blaster. If you wish to keep the RDS all you have to do is cut off the piece that goes over the screw-port (sorry I forgot to take a picture).
The hardest part about reassembling the blaster is getting the spring to sit on the spring rest. I left the plunger-tube and plunger-rod till last and then, with the help of some pliers wrestled them in and closed the blaster up.
Making the clips:
My 'clips' will be made for use with small 25mm long silicone tipped darts. If I want to use different dart sizes or types I can just alter the design to compensate.
The first thing I made was a singled barrel. All I'm gonna post up are the design and the finished product as it's stupidly easy to make.
The second 'clip' I made was a four dart inline clip. I followed the standard Inline clip design with one slight difference. As the whole clip will be removed I added a small (5mm) piece of 16mm UPVC to the back of the clip. This piece of UPVC was beveled on one side, because the UPVC has a tight fit on darts and because of the bevel on the outer side it is very easy for darts to enter the clip (ie: from you loading them in) and very difficult for the darts to fall back out of the clip (whilst the clip is in your pocket). What this means is you can make multiple clips and store them in your pockets/kit for quick reloads during a match. It also means you can always have a full clip ready in your blaster whilst reloading another.
All done.