

Hi,
After completing SG Nerf's barricade pressure switch mod, I found it difficult to consistently perfect the timing with the trigger to keep the flywheels constantly spinning. I came up with the idea of adding a momentary action switch, in place of the stock pressure switch.
As mentioned, this is just an alteration to SG Nerf's original mod. I've also added a laser dot module, with an active led indicator, as well as a voltage mod to 9 volts. Once I receive my 14500's, I'll be reverting back to the original voltage increase of 8.4 volts.
Let's begin:
Equip required:
(A number of items depend on personal choice - I will list what I have used)
SPT momentary action switch ("momentary on")
Mini slide switch with solder tail
Led with bezel(green, 3mm, 1.7v)
Laser light module (3.2v, 1mW unit)
9v battery and 9v battery snap
Power supply for laser light (2 x AAA battery)
Light duty hook-up wire and heatshrink tubing
Basic modding tools, as well as:
Soldering iron
Hot glue gun
Drill/Dremel
Obviously, you'll need to begin by removing the screws from the blaster (don't forget the one inside the battery tray).
Voltage Increase
The easiest way of doing this is using 2 x unprotected 14500 batteries, with either 1 link wire, or a AA spacer/dummy to fill the third battery slot. The 14500's that I had were protected, which won't work. I wouldn't recommend using 9v as a permanent increase though.
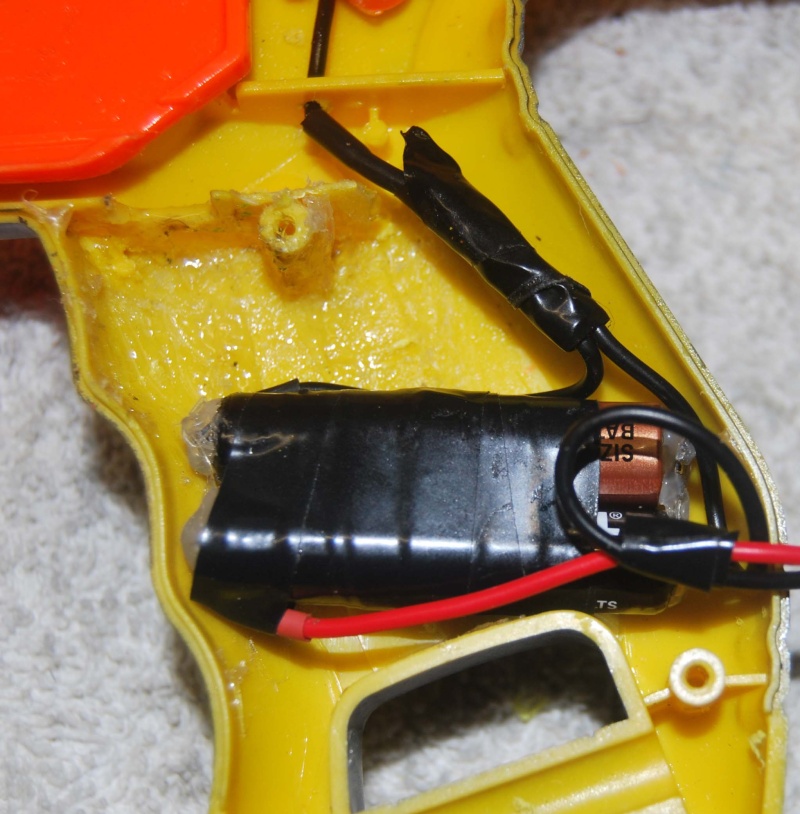
Once you've opened up the blaster, drill two small holes through the battery tray to allow the wires of the battery snap to feed through. Solder the positive and negative wires to the corresponding tails on the inside of the blaster. Next, solder some hook-up wire to link the other 2 sets of tails to complete the circuit.

Dremel out a groove inside the battery tray for the 9v battery to fit. Also, remove the lip from inside the orange battery lid. The 9v is still too deep for a perfect fit, but the lid will still go on - it does bulge out a little. You could probably dremel out enough for the battery to fit properly, but I've only done this as a temporary modification, hence I've tried not to butcher the battery tray too much.

Momentary action switch
To begin, remove the pressure switch from behind the trigger lock/on-off switch. I've also removed the pressure switch from underneath the jam slide, and associated wiring. This allows the flywheels to spin regardless of what position the door/slide is in.
Drill a hole in the handle (the side will depend on which hand you use the blaster with) big enough for the momentary action switch to fit. Connect the switch to the wires from the original on/off pressure switch (to avoid congestion, run the 2 wires under the trigger lock), connect power, and the flywheels should spin while you hold the button down, and stop when you release.

Laser dot and power indication led
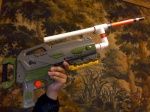
Remove the orange holder at the front of the blaster that houses the flywheels and motors. Drill a hole through the orange sight which protudes off the top of the barrel, to mount the laser module. You'll want this to be as straight as possible, and the module will need to be a tight fit. I housed my laser module inside a small piece of aluminium tubing that I had lying around.
Run the positive and negative wires along the same track that the motor wiring follows. Run the negative wire under the trigger mechanism (you will need to drill through a small lip for the wire to fit nicely) Mount the laser, and replace the flywheels and motors.

Drill a small hole in the rear of the blaster to mount the led light. Secure the bezel in the hole with hot glue, or super glue, and insert the led light in to the bezel.

Dremel a hole in the bottom of the handle to house the mini slide switch. I secured the switch using hot glue (and maybe a little too much of it!!)

I couldn't get a 2 x AAA battery holder to fit in the handle, so I just soldered link wires directly to the batteries. I wouldn't recommend this to everyone though, as too much heat isn't a great combination with batteries. There are plenty of other options though, including:
Using wire glue to fuse the wires to the batteries (this is a painfully slow technique)
Li-ion battery, eg: a 14500 (which will give approx 4.2v)
3v coin/cell battery in a holder
Whichever option you choose will be dependant on the voltage requirements of the laser module and led light that is used. When I do this to my other barricade, I will be using the 3v coin battery, mainly for size and convenience.
Once you've decided on what battery combination you will use, connect the led, laser module and switch to the power supply, and test. You will need to drill some small holes for the wiring in certain places. All the wiring needs to be run as neatly as possible, as it interferes with the trigger mechanism if not mounted properly (Even though my wiring isn't that neat, the blaster does function properly. I will be re-wiring the whole blaster with some smaller diameter wire at some stage)

All that's left to do is re-assemble the blaster.

I've found the momentary action switch to be alot easier to use than a trigger-mounted pressure switch, and it really doesn't get in the way of holding the blaster. You can change the depth that the switch is mounted as well, if it does interfere with your normal grip.
So there you have it. Voltage increase, laser dot with power indication led, and push-button flywheel activation.
Looking forward to any feedback on my first tutorial. As mentioned previously, the majority of credit for this mod goes to SG Nerf.
Enjoy!!
After completing SG Nerf's barricade pressure switch mod, I found it difficult to consistently perfect the timing with the trigger to keep the flywheels constantly spinning. I came up with the idea of adding a momentary action switch, in place of the stock pressure switch.
As mentioned, this is just an alteration to SG Nerf's original mod. I've also added a laser dot module, with an active led indicator, as well as a voltage mod to 9 volts. Once I receive my 14500's, I'll be reverting back to the original voltage increase of 8.4 volts.
Let's begin:
Equip required:
(A number of items depend on personal choice - I will list what I have used)
SPT momentary action switch ("momentary on")
Mini slide switch with solder tail
Led with bezel(green, 3mm, 1.7v)
Laser light module (3.2v, 1mW unit)
9v battery and 9v battery snap
Power supply for laser light (2 x AAA battery)
Light duty hook-up wire and heatshrink tubing
Basic modding tools, as well as:
Soldering iron
Hot glue gun
Drill/Dremel
Obviously, you'll need to begin by removing the screws from the blaster (don't forget the one inside the battery tray).
Voltage Increase
The easiest way of doing this is using 2 x unprotected 14500 batteries, with either 1 link wire, or a AA spacer/dummy to fill the third battery slot. The 14500's that I had were protected, which won't work. I wouldn't recommend using 9v as a permanent increase though.
Once you've opened up the blaster, drill two small holes through the battery tray to allow the wires of the battery snap to feed through. Solder the positive and negative wires to the corresponding tails on the inside of the blaster. Next, solder some hook-up wire to link the other 2 sets of tails to complete the circuit.
Dremel out a groove inside the battery tray for the 9v battery to fit. Also, remove the lip from inside the orange battery lid. The 9v is still too deep for a perfect fit, but the lid will still go on - it does bulge out a little. You could probably dremel out enough for the battery to fit properly, but I've only done this as a temporary modification, hence I've tried not to butcher the battery tray too much.
Momentary action switch
To begin, remove the pressure switch from behind the trigger lock/on-off switch. I've also removed the pressure switch from underneath the jam slide, and associated wiring. This allows the flywheels to spin regardless of what position the door/slide is in.
Drill a hole in the handle (the side will depend on which hand you use the blaster with) big enough for the momentary action switch to fit. Connect the switch to the wires from the original on/off pressure switch (to avoid congestion, run the 2 wires under the trigger lock), connect power, and the flywheels should spin while you hold the button down, and stop when you release.
Laser dot and power indication led
Remove the orange holder at the front of the blaster that houses the flywheels and motors. Drill a hole through the orange sight which protudes off the top of the barrel, to mount the laser module. You'll want this to be as straight as possible, and the module will need to be a tight fit. I housed my laser module inside a small piece of aluminium tubing that I had lying around.
Run the positive and negative wires along the same track that the motor wiring follows. Run the negative wire under the trigger mechanism (you will need to drill through a small lip for the wire to fit nicely) Mount the laser, and replace the flywheels and motors.
Drill a small hole in the rear of the blaster to mount the led light. Secure the bezel in the hole with hot glue, or super glue, and insert the led light in to the bezel.
Dremel a hole in the bottom of the handle to house the mini slide switch. I secured the switch using hot glue (and maybe a little too much of it!!)
I couldn't get a 2 x AAA battery holder to fit in the handle, so I just soldered link wires directly to the batteries. I wouldn't recommend this to everyone though, as too much heat isn't a great combination with batteries. There are plenty of other options though, including:
Using wire glue to fuse the wires to the batteries (this is a painfully slow technique)
Li-ion battery, eg: a 14500 (which will give approx 4.2v)
3v coin/cell battery in a holder
Whichever option you choose will be dependant on the voltage requirements of the laser module and led light that is used. When I do this to my other barricade, I will be using the 3v coin battery, mainly for size and convenience.
Once you've decided on what battery combination you will use, connect the led, laser module and switch to the power supply, and test. You will need to drill some small holes for the wiring in certain places. All the wiring needs to be run as neatly as possible, as it interferes with the trigger mechanism if not mounted properly (Even though my wiring isn't that neat, the blaster does function properly. I will be re-wiring the whole blaster with some smaller diameter wire at some stage)
All that's left to do is re-assemble the blaster.
I've found the momentary action switch to be alot easier to use than a trigger-mounted pressure switch, and it really doesn't get in the way of holding the blaster. You can change the depth that the switch is mounted as well, if it does interfere with your normal grip.
So there you have it. Voltage increase, laser dot with power indication led, and push-button flywheel activation.
Looking forward to any feedback on my first tutorial. As mentioned previously, the majority of credit for this mod goes to SG Nerf.
Enjoy!!
Last edited by clunk07 on Sun May 29, 2011 4:29 pm; edited 1 time in total